Wednesday’s Whip Up: Vintage Spools

Back in July, we took a trip to Folly Beach, near one of my favorite places – Charleston, SC. Hubby and I used to live there and I never get tired of the history, architecture, food and shopping!
While there my sister-in-law, Ilke, and I vowed to do some antique shopping. We took one afternoon and hit as many as we could in the ares outside of downtown. {Downtown’s antiques are WAY over our budget!} Here are some of my finds…

I found several vintage handkerchiefs, ribbons and lace. I had no idea what I would do with them, but I had to have them!

And I am a sucker for vintage spools.

Originally I was going to leave the spools the way the were and use them as candles sticks. But I had an idea the other day while I was trying to figure out where to put them.
I decided to wrap them in burlap and then use the vintage ribbon and lace on top of the burlap.

I used hot glue to secure the burlap on the backside. I did the same with the lace. The ribbon I just tied in a knot, tightly enough that it would not slip down.

I frayed the top and bottom of the burlap by pulling some of the horizontal threads out.

And that was it! Just something I whipped up on Wednesday!

Spring Wreath with Paper Flowers


 A while back, during one of my weekly trips to Hobby Lobby, I found these fun paper flowers.

paper flowers

I just loved them! I didn’t really know what I would do with them, but I knew I had to have them! Eventually I decided I could use them for a wreath for the front porch. After all, they did match my yellow chair and other porch decor perfectly!
I decided to make this one pretty simple. I got one yard of brown burlap, the flowers and a straw wreath.

I cut the burlap into strips. I wasn’t too careful to make sure they were straight or even because it’s burlap, and it’s not supposed to look perfect!

cut strips burlap

I used hot glue to secure the first strip to the wreath and wrapped the strips around the wreath.

wrap burlap wreath

Each time I needed a new strip, I glued it to the back side of the wreath, close to where the previous piece ended.

wrap burlap wreath

I wrapped the wreath in two layers of burlap.

burlap wreath how to

I cut the stems off of the flowers.

cut bud from stem

And used hot glue to attach them to the wreath.

hot glue buds flowers

I arranged them in a cluster to hide the leftover stem pieces.

paper flowers

I didn’t like the bright green color of the leaves, so I spray painted them with a pretty avocado paint.

paint silk leaves

Then glued the leaves to each end of the cluster.

And here is my new spring wreath! Complete with a yellow striped ribbon to match my fun yellow chair!

Paper Mache Eggs: Part I

What started as a simple paper mache project, turned into some pretty fancy eggs!

I gotta admit that I was pretty pleased with myself! You see, I really only had intended on covering the eggs with a decorative scrapbook paper.

It all started like this. . .

Some plastic eggs, water, Decoupage (I ended up using Elmer’s glue), sponge brushes and bowls.

I mixed the glue and water {I didn’t measure, but I’d say 1 part glue to 3 parts water} and poured into smaller bowls. I guess I forgot to mention that I let the kids make some of these too. I gave them their brushes and bowls and let them go to town.

Anyway, I used some packaging paper as my base coat.

I tore it into pieces. . .

and soaked it in the glue mixture.

Then covered my egg using the traditional paper mache technique. I did have to shape and smooth some of the paper with my hands.

Next I took my Stampin Up! designer series paper and matching cardstock. . .

*If you are not familiar with Stampin’ Up! dsp, it’s double-sided with coordinating colors and patterns. They also have coordinating cardstock papers.

and tore it into pieces.

For the most part, I used one designer series paper and along with one color cardstock paper on each egg. I did a little at a time, letting each layer dry a little before adding the next. When they were completely covered, it took overnight to dry. I even had them under a heat lamp for several hours!

But in the morning they were finally dry! This was where I had anticipated being finished. BUT, it needed something else. {You’ve never heard me say that one before, have you?}  If you are a regular reader, I’m sure you could guess what I did.

Yes, I took out my Distress Ink pad and started inking it! To do this, you just lightly brush the ink pad against the paper in a back and forth motion.

Much better.

Then, I added one coat of pure Mod Podge because I like the little hint of shine in it’s finish.

And now, I thought I was done! But I wasn’t! I had another idea.

So I grabbed a few coordinating Stampin Up products and worked on the eggs some more.

But I’m going to share that with you tomorrow. For now, just take a sneak peek!

A New Look for My Breakfast Room

Happy Friday friends! No snooping around Blogland for me this week. Nope, I’ve been too busy doing other things. And because I just love to drive myself mad by adding more things to my list, let me show you what I’ve gotten myself into.

I’ve mentioned a couple times since taking the Christmas decorations down that I feel the need for new. New decor. Maybe new color. Just a new look. I did a few minor changes to my family room and so I moved on to my kitchen and breakfast rooms. It all started with my rugs. I have black shag rugs in the kitchen and black and a black and gold rug in the breakfast room with matching runners. These rugs have been driving me insane! No matter how often I vacuumed them, they never looked clean! If I didn’t do something, they would be then end of me! But I hate rug shopping! It is so hard to find a perfect rug, so I just let them drive me crazy. Until one day, about three weeks ago, when I just couldn’t take it anymore. I picked up the shag rugs and threw them in the garbage. Why? Because once I did that, there would be no turning back. They were gone. I would have to get new ones! Sigh. . . three weeks later and I still have no rugs in the kitchen. Actually I’ve purchased two different sets of rugs and returned them both.

However, in the midst of my search for the perfect kitchen rugs, I decided I would do some work on my breakfast room. I found a set of rugs at Target that I thought would be nice for the breakfast room. It matched the wall color perfectly! Unfortunately, it didn’t match the window treatments. But that was okay because right around the corner from the rugs were some really cute drapes. And by golly, they just happened to match!

That trip to Target, in search of kitchen rugs, turned into a new look for the breakfast room.

Unfortunately, this was the only photo I could find of my breakfast room before. It was from Thanksgiving. But you can see the black and caramel window treatments in the background.

I have to say it was amazing how much larger and brighter this room was with the new drapes!

But as much as I loved these new window treatments, I wasn’t sure I liked them with the black furniture. Normally I would just say paint the furniture, but I’m just not up for a project like that right now. I still liked the new look better than the old, so I thought I could deal with it!

Then, the other day, I went to Hobby Lobby to help a friend pick out some fabric and I found this. . .

I tried to walk away, but it was calling my name. I took home 9 yards! What was I thinking? What am I going to do with these brand new window treatments I just purchased from Target? And when am I going to find the time to sew new ones from this fabric? I’m nuts!

But just look at how perfectly it all goes together. I love it! I’m so excited! And even though I won’t have to do any furniture painting, I’m now considering changing the color on the wall. Just a slightly lighter shade. Oh Jen. . .

Reinventing an Old Milk Can

I told you I had something to share today! I finally took a little break from the favor boxes lsat week to regain my sanity with some other type of creativity. Unfortunately that break {and my allergies} have now caused me to be way behind!

Anyway. . . I finally made good use of this old milk can. Actually, I’ve had it sitting in this spot since Christmas {I put long pine branches in it} but it wasn’t finished.

You might {or probably don’t since it was ages ago} remember on my trip to Cline’s Antiques Junk Yard I picked up this rusty old milk can. You might think it looks hideous, but I was in love! Not long before I had featured a blogger had painted her house number on a milk can for her front porch. So I was thrilled to have found one, no matter what condition it was in! Nonetheless, I think I only paid $8 for it.

Even though I like rust, this piece was a little too rusty for me. So I spray painted it with one of my favorite colors. Rustoleum Oil Rubbed Bronze.

I used my Silhouette CAMEO to cut stencil vinyl {I’m sure regular vinyl would work fine}. I did “No. 4 “for the number of people in our family.

After cutting the vinyl, I peeled the outer piece away from the backing carefully, leaving the cut image behind.

Then stuck it on the milk can. Because the milk can surface was textured from the rust and spray paint there were some areas of the vinyl that didn’t quite stick. Plus the font was pretty intricate and I couldn’t quite get it placed right. So I had to modify my original idea of using a stencil blotter brush because I knew the paint would bleed through.

Instead I used a fine tip and painted carefully inside the stencil. Two good coats.

When I peeled off the vinyl, there was still a little bit of bleeding, but I went back with my fine tip and traced over the letters one more time which helped cover it up.

The final result! I tied a strip of burlap around the neck and filled it with long branches of greenery, cherry blossoms and my cute little sticks with lighted tips.

Oh how I love junk! And reinventing fabulousness from junk makes me happy! Now back to the favors! Have a great weekend y’all!

Skip To My Lou

Touches of New Decor

After Christmas, when I take down all the trees, lights and other decorations, my house feels empty. It looked the same before all the Christmas decorations went up. It didn’t bother me then. Yet every year when the Christmas decor comes down, the house feels bare. So I get the urge to shop and to do some re-decorating.

One trip to my favorite home decor store spruced up my family room. I’ve told you before how much I love Kirkland’s! You might remember when I changed my dining room, most of the decor came from Kirkland’s. So what did I get? Just a few items that really made a big impact and help fill the “void”  the Christmas decor has left behind.

This beautiful new lamp. It’s large size helped fill some empty space. I got a great deal on it because it was broken. You know I’m always looking for a bargain!

I hid the crack by turning it towards the wall. You’d never know!

I found these two candlesticks at Homegoods {my other favorite store for home decor}. I knew I needed something with more height to sit along side them. These matching floral arrangements {from Kirkland’s} were prefect! They were on sale so I got both for about $80.

Then the table behind the sofa. I have struggled with this table and often change the decor. I found this small, but bright arrangement and a large frame that fit well in one corner of the table. Both were on sale and the total was about $20.

One trip to Kirklands, about $150 and I have a new family room!

One area I wasn’t planning on changing was my foyer chest. I purchased this beautiful antique chest over the summer at a yard sale for $35! The green lamp on top was my grandma’s. I just love it! But. . .

hubby broke it when he was carrying a mattress up the steps. He tried to glue it, but it’s just not the same. I’m trying not to be mad at him.

Luckily, that same week, Kirkland’s sent me a nice little surprise in the mail! A lamp from their 2012 collection!

It’s a whole new look for my foyer table, but I like it! Very bright and fresh! Thank you so much Kirkland’s!

Are you suddenly feeing the urge to do some shopping at Kirkland’s? I have good news for you! Along with the lamp, Kirkland’s gave me a $50 gift certificate to give to one of my readers! You can do a lot with $50 at this store!

How do you enter?

    • Stop by Kirkland’s online and do some browsing. You’re gonna like what you see! Come back and tell me what you would buy if you win.  {1 entry}
    • For additional entries, do any {or all} of the following. Be sure to leave me a comment telling me you did. {leave a separate comment for each task}

 1. Like Kirkland’s on Facebook.

2. Like Scissors and Spatulas on Facebook.

3. Follow @scissorspatulas on Twitter.
Please read giveaway rules here. The giveaway will remain open until Friday, March 9, 2012. I will announce the winner Monday, March 12.

What I’ve Been Up To (Christmas Crafts)

Hello friends! I just cannot believe that Christmas is just days away! It completely blows my mind! Where has December gone? 
We had a handmade auction last week at Stamp Club. All proceeds went to the Ronald McDonald House. With just a handful of us we raised over one-hundred dollars! There were no limits or restrictions to the items we brought for the auction except that they had to be handmade. I just wanted to quickly share with you the items I made. I do not have the full tutorials, but I will do my best to explain how I created them.
This project started with the angel image. I found about 5 or 6 of them in a small baggie at the thrift store for fifty cents. I think someone just printed them off on cardstock to be honest, but I thought they were pretty. I tore the corners just a little bit and used sandpaper around the edges of the image to make it look more worn. Then I used my distress ink pad around the edges. This is the first time I’ve tried distressing paper with sandpaper and I was really pleased with the way it looked after I brushed it with the ink. The ink really soaked into the paper since it had been thinned from sanding.
Next I used my sewing machine to stitch the lace and burlap to the image. I also used two-way glue to adhere the image, but because burlap is so rough I thought sewing it would help keep it in tact. Plus, I like the look of stitching. I attached the burlap to the designer scrapbook paper with hot glue. After this, I was stumped. I didn’t really know what else to add. Then the song Hark! The Herald Angels Sing” popped into my head!

Luckily I had some old hymnals that I found at Goodwill a while back. I flipped through one and knew this would be perfect! I tore just below the first phrase, distressed it with the ink and attached it with double-sided adhesive.

I found a piece of scrap wood in the garage, hubby cut it to size, drilled holes in it, I inked it {of course} and I added some jute rope to make it hang. I love this piece! 
 Who is Angie? Angie is the Stampin’ Up! demonstrator that hosts the Stamp Club events. 
I call this piece “Angie-inspired”because she made a Christmas card that I used as inspiration and I used the technique she used to make that Christmas pillow that I love.

For this piece, I adhered iron on pellon interfacing {basically iron-on adhesive for fabric} to the back of my fabric and used my Silhouette to cut the ornaments. Be sure to apply the interfacing before cutting! It makes the fabric nice and stiff for smooth cuts. Then I peeled the liner away and ironed the ornaments on to the black and white damask fabric. I then used fabric glue to attache the ribbons. Each ribbon is two separate pieces. One short piece for the vertical “hanging” ribbon and a longer piece for the bow. I find it is easier to tie the bow and then cut the ribbon so you know it is long enough. 
 The frame I found at the thrift store for a couple bucks. It had a really ugly tropical fish print in it but the frame was fabulously fat! I trashed the print and the glass and wrapped the fabric around the cardboard insert. I sprayed a very light coat of black satin paint on the wooden frame and then scuffed it up a little with sand paper. I replaced the insert wrapped with fabric and viola! 
Don’t forget to stop by and enter the My Memories giveaway! The winner will receive the digital scrapbooking software for FREE!

The Stockings Were Hung. . .

I shared this tutorial over at Seamingly Smitten last week, but wanted to share it again just in case you missed it. After my post about my trip to Cline’s JunkyardI had a lot of questions about what I would do with these. . .


I had a handful of old rusty door knobs that I picked up along with some other rusty hardware. I didn’t really have a clue what I was going to do with them, but I knew I could use them for something. And I was right! So I started wit a piece of scrap wood from the garage {I have a huge pile of scrap wood in my garage. you name it, I got it!} and my four rusty old door knobs. 


This first step was fun. The wood was too perfect, so I took a hammer to it. What a great stress reliever! I just banged it up a bit to round the corners and rough up the surface. 

Next I used a dark stain in these crevices and around the edges. This is because I plan on distressing the paint I’m about to apply and the dark stain looks better than the light wood.

A light coat of primer spray paint and one heavy coat of white latex paint. 


While the paint dried I pulled out my brand spankin’ new Silhouette Cameo to use for the very first time. Sigh, it’s amazing! You gotta get one of these! I used red vinyl for this project.


If you are not familiar with the Silhouette or any other digital cutting tool, you create an image on your computer and then let the machine do the rest. 


The best way to transfer vinyl is to use contact paper. Once the image is cut, place the sticky side of the contact paper on top of the vinyl while it is still on the mat. Peel the contact paper away from the sheet of vinyl and only your cut letters should stick to the contact paper. (Unfortunately the insides of the letters also stuck. I removed them with a tweezers after I adhered it to the wood.)

When the paint was dry I used some low grit sandpaper to give it a distressed finish.

My sweet hubby drilled holes in the wood to just large enough to fit the knobs.
And then he squeezed them in. I thought we would have to use wood glue to hold them, but they stayed just fine without it.
And because I can’t leave anything alone, I used my distress ink to make it look more worn. To do this you just take the ink pad and brush it across the edges and corners and in small spots along the surface.

Now back to the vinyl. Place the contact paper gently on the board. Once it’s in place, where you want it, you can press down on it to keep it in place. Use a scraper or other flat edge to smooth over the vinyl, eliminating any wrinkles or bubbles. Then peel back the contact paper slowly.
The contact paper removed some of the paint, but was okay with me! I love a distressed look!

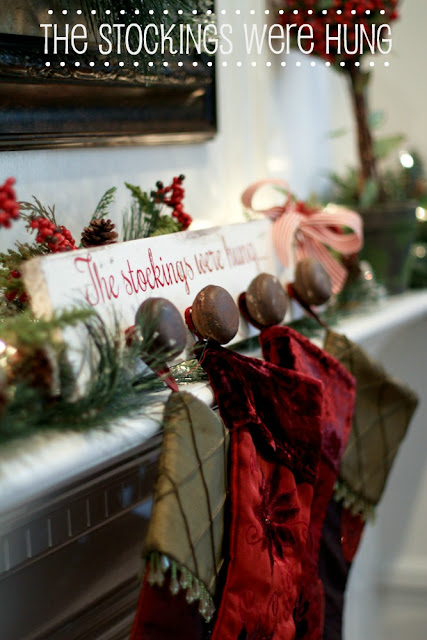
I wrapped and tied a fat grosgrain ribbon on one side and then hung our stockings. I’m thinking about either adding an initial to the knobs or writing our names in black just above the knobs. But that will be another day. Like I said, I can’t leave anything alone!

But for now it’s perfect! You know I love to brag about how little I spend on my projects so. . .
This one cost about two bucks! Actually, it was free for me to make that day since everything I used, I already had lying around. But if you want to count the purchase of the knobs, this project cost me only $2! Even if you don’t have a digital cutting machine, you can use a stencil to paint the letters. Inexpensive hooks can be purchased in place of the door knobs if rusty junk isn’t your style.

How can Christmas be in just ten days? The stockings may be hung, but I’m not sure Santa has what is supposed to go in them!

Todays Creative Blog

Tour of My Home at Christmas

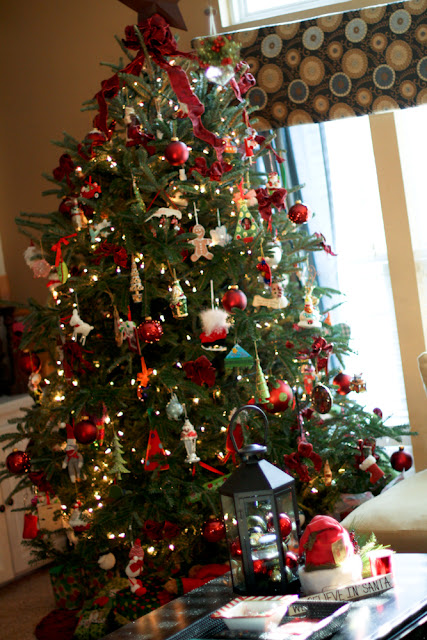
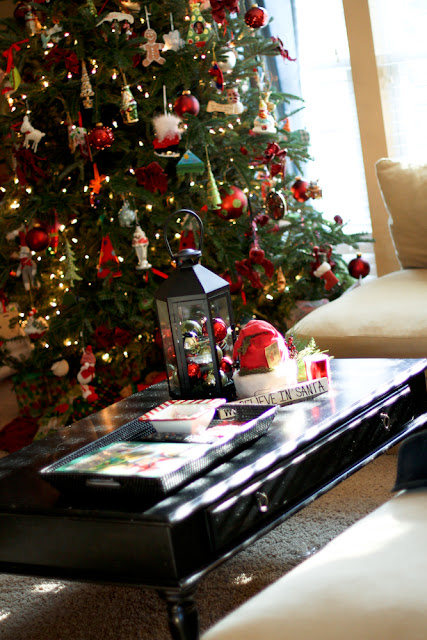
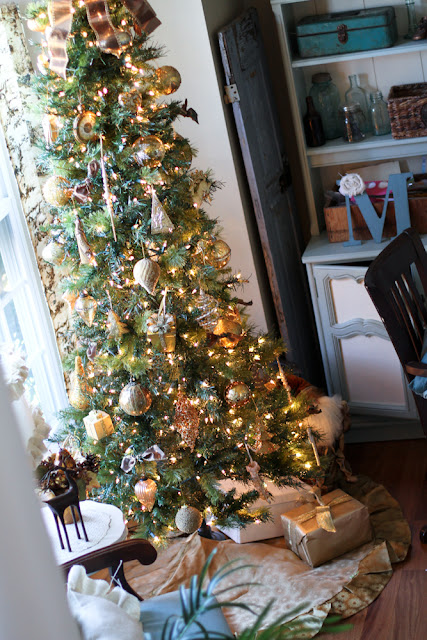
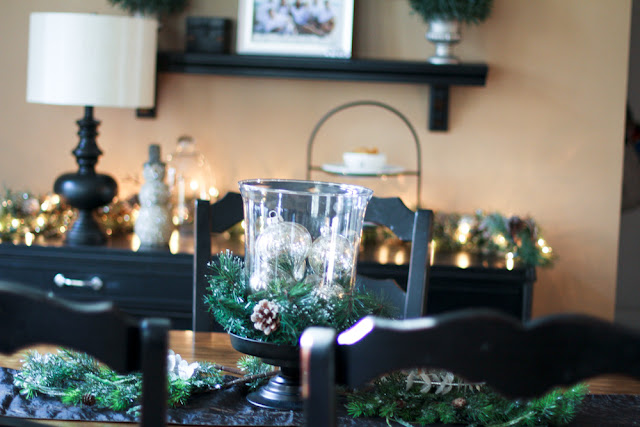
 Hi! Welcome to my home, decorated for Christmas, of course! I will confess that I have two large pencil trees that I didn’t put up this year. {frowny face} Because I re-decorated so many rooms this year, I had to modify my tree decor which added some time to my decorating. Oh well! You’ll notice that I ove Christmas decor! I pack up most of my everyday decorations and replace them with lights, garlands, ornaments and trees. I LOVE the modd that is set with white Christmas lights! I wish I could leave them up all year! 
Welcome! Have a look around. I hope you’ll see something you like!

 {This tree is special. It is decorated with keepsake ornaments that my grandma has given me every year since I was born.}

And there ya have it! It’s beginning to look a lot like Christmas ’round here! Hope you all had a fantastic weekend!

Ruffled Christmas Trees

Can you believe that it’s December 1st?  Christmas is right around the corner! I’ve finally finished decorating my house, and I promise I will post pics soon! I love decorating my house for Christmas! I transform just about every room into a winter wonderland! I even have an entire attic for Christmas decor only! But I can never have enough Christmas decorations, so soon I may have to clean out a closet or two to hold more stuff! 
Example: A few months ago I found these cones at the thrift store. At first I walked on by, but I quickly took a few steps back and picked them up. Twenty-five cents each! What was I going to use them for? I dunno. I knew I could figure something out! And I did! 

I ruffled some fabric scraps and grabbed a couple of mismatched wooden candlesticks. {Also from the thrift store. I have a stockpile of these because they are usually fifty cents to a dollar a piece.}
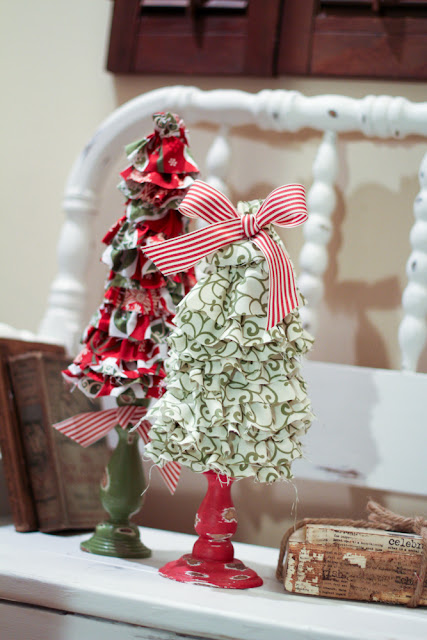
And this is what I made! ruffled Christmas trees! 
How? Keep reading! 
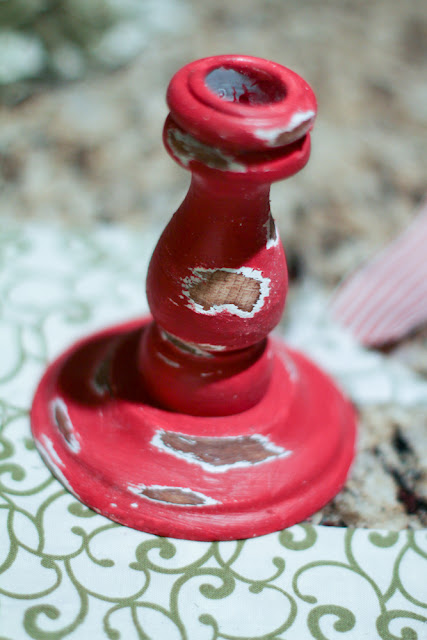
I primed both candlesticks and painted one green and one red. Both were paint colors I had on hand. {Yes, the green one is hanging from a tree branch. I spray paint a lot of things this way to get even coverage all the way around.}
Then I scratched it up. If you’ve ever been on my blog, you know that I love to paint and I love to remove paint! I’m a bit of a distressing addict! It gives pieces character!
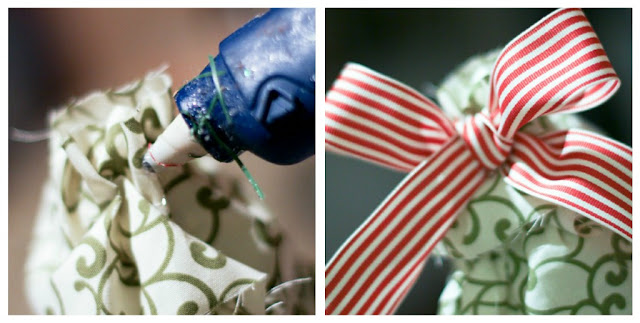
Starting at the bottom, I took my ruffled fabric and wrapped it around and up the cones, securing it with hot glue. 
I added an additional piece of fabric to the bottom of the cone and
 I attached the candlestick with hot glue.
To finish off the top, I added a big fat striped ribbon. 
And here they are! Two ruffled Christmas trees for under $2! Remember, the cones were twenty-five cents each and the candlesticks were fifty cents each. The fabric was leftover scraps and the paint I had in my garage. Even if you didn’t have all the materials it would probably cost less than $10!  

So what are you waiting for? Go make some Christmas trees! You can never have too much holiday decor!