Do you remember these lamps?
They were thrift store purchases a few months ago. I loved the shape of the base and I loved the shape of the shade. I knew I had to hav them, although I had no idea where I would put them or how I would transform them, but I had to have them!
So I bought them and they sat in my garage for a couple months. Then, one day, it hit me! I knew exactly what I wanted to do with them. So I started searching Pinterest looking for some examples of what I had in mind. Three hours later, I made a decision. If you’ve been on Pinterest, you know what I’m talking about.
So here is what I decided. I would spray paint the brass bases to match the other metals in the room {
aged copper meets oil-rubbed bronze}. If you are painting brass, be sure to use primer first! Then, I would cover the shade with ruffled burlap. I cut the burlap into strips and was ready to go.
Who the {bleep} knew that ruffling burlap would be so difficult?!!
After reading several tutorials for how to ruffle fabric, I decided to go with the easiest. I turned my machine setting to the longest and loosest stitch settings.
From what I read, these settings were supposed to ruffle the fabric for me. I went to town with my sewing machine and burlap, sewing a straight line down the center, eager to see some ruffles!
Humph? Not exactly what I had expected. So, I tried to pull one of the threads {an idea I had read from a different ruffling tute}, but it broke. What the heck?!
Okay, I’ll try this other method I saw.
As I sewed I folded pleats in the fabric. This was a pain and I was so scared that my finger would get poked.
And it still didn’t turn out the way I wanted it. I tried to pull the thread again, but again, it broke. By now I was getting frustrated. When I get an idea and can’t execute it I get upset. Pissed off, actually. But that anger provokes determination.
Finally, in all that frustration, I had an ah-ha moment.
I had some extra strong thread that I had bought to use for my dining room drapes. Maybe it could withstand the tugging. So I started over, sewing straight up the middle with the stronger thread, the machine set as shown above.
When I had sewn the entire length, I gave one string a tug.
Hallelujah! It worked!
I pulled the one string hard but carefully until the strip was ruffled just the way I wanted it.
Lesson learned: When ruffling heavy fabric like burlap, be sure to use strong thread!
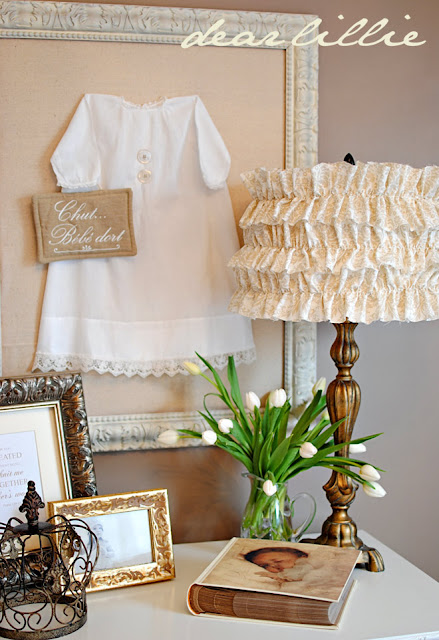
Originally I thought I would cover the entire shade with the strips of ruffled burlap like this one from Dear Lillie. . .
but I changed my mind after I glued the top and bottom pieces on the shade. I decided I liked it just like that {and I was really tired of ruffling}.
I put one on a side table. . .
and the other on my sewing table. Let there be light! Up until now, I’ve been working only during the day because I had no lights in the room!
Speaking of lighting, check out this lamp I found on clearance for my work table/desk area!
Isn’t it so very Pottery Barnish? I’ve been searching for a desk lamp for months. I knew exactly what I wanted {it was from PB but much too expensive for me}. This one I found at Homegoods on clearance because it had a couple of bolts missing on the neck. Hubby secured the screws and it’s good as new! And it was only $25 people!
Are you noticing that my craft room is coming together? I think I’m just about ready to show you the entire room. I have everything organized and put away. The only reason I’m holding out on the reveal is because I have not finished the curtains and many of the walls are still bare. Soon, I promise!


 Well, I finally got my rear in gear and made some drapes! At this point I was so irritated with looking at that pile of fabric that I just picked it up, cut it into strips, and hemmed the edges. Seriously! Nothing fancy about these guys!












 f
f

