Decorated Halloween Branches

 I kept my Halloween decorations to a minimum this year since our house is currently on the market. Did I tell y’all that, by the way? Yes, the house went on the market! Anyway, as much as I love decorating for Halloween (and fall in general), I kept it minimal for staging purposes. I hate my house being staged. It doesn’t feel like my house.

halloween branches with paper ornaments

But I did create this little vignette on my kitchen sideboard.
The weather here in SC has been gorgeous! I sent the boys into the woods in our back yard and asked them to find me some big branches. Of course this was not a difficult task for them! They love collecting sticks!

I spray painted the branches with some black spray paint I had in the garage.

During the process of turning and drying each side, I made the “ornaments.” I already had made some of these rosettes for a holiday craft party I had for the neighbors. I used Stampin Up designer series paper, punches and the Designer Rosette Bigz Cutting Die to create the accordion folded rosettes. (order rosette die here) I basically layered the different pieces using the coordinating papers from Stampin Up. (They make it so easy!)

halloween rosette howlstooth scaringbone stampin up

I used Howlstooth and Scaringbone designer series paper for these two. I LOVE this paper! It is darling for Fall and halloween, but can also be used any time of the year! You can order it here.

halloween rosette howlstooth scaringbone stampin up

  These next two are made from Stampin Up’s Wicked Fun designer series paper, which, by the way, is on clearance for an excellent deal! Order it here.stampin up wicked fun halloween rosette

This ornament also uses the Lifestyle Crafts Lattice Doily cutting die.

lifestyle craft delicate doily die cut halloween ornament

I also used this skeleton cutting die from Lifestyle Crafts Tricks ‘n Treats collection.

lifestyle crafts skeleton die cut

Once I started assembling it, I realized that it would be a great activity for the boys!

lifestyle crafts skeleton die cut

So I cut two more sets and told them to see if they could build a skeleton.

I let them do it on their own first and I was pretty surprised at how well they did! But then I let them use mine as a model to glue their pieces to the paper.

lifestyle crafts skeleton die cut

lifestyle crafts skeleton die cut

My skeleton got some ribbon and some distressing and was hung on my tree with the rosettes.

lifestyle crafts skeleton cutting die

And here are all the “ornaments” all together on the branches.

halloween branches with paper ornaments

My little corner of Halloween!

Hey, have you entered to win the Designed Beginnings store credit? You could win a $40 store credit to use on anything  you want! Don’t miss out! YOu have until Friday, October 19 to enter! Just click here.

The Very Hungry Caterpillar Art Activity

A couple weeks ago Jackson’s preschool held a family literacy night. The event was centered around the author Eric Carle and his books.

Eric Carle

The kids had a blast visiting each classroom which had a different art activity based on one of Eric Carle’s popular books.

What I wanted to share with you was one of the activities the kids did in their classroom in preparation for the literacy night. They had been studying butterflies and read The Very Hungry Caterpillar in school. Each student made their own hungry caterpillar and the walls were decorated with their artwork.

I thought this idea was so cute! Obviously, it is made from handprints. Let’s be honest, what parent doesn’t love art made from handprints?! Anyway, just wanted to share in case you want to try it at home with your little ones. Don’t forget to read the book, The Very Hungry Caterpillar, first!

Seat Sacks for the Kids

Cleaning, organizing, cleaning and more organizing. That’s what I’ve been doing for the past week. I’ve got a huge pile in the garage to donate, and overflowing trash can and still so much stuff that I have no where to put it!

Last January, I organized my kiddos’ coloring table by creating these IKEA knock-off hanging buckets which was a great way to organize their crayons, markers and pencils. It’s also been a great space-saver since the table is small. However, the buckets didn’t solve the problem of coloring book and paper storage. Since the boys got new coloring books, activity books and stickers for Christmas, I needed a solution. I wanted everything to be right there, at the table where they could see and reach the books on their own.

I came up with these cute little seat sacks! Back when I taught kindergarten, several teachers used these on the backs of the students’ chais since kindergarteners use tables, not desks. They are perfect for holding books, paper and other table activities.

I really didn’t have a method to making these. I kinda just made it up as I went along. I started by measuring the fabric to fit the length and width of the chairs, also making sure it was wide enough to hold books.

I started with a long, rectangular piece of fabric for each chair. I basically hemmed the entire length of both sides as well as the top. I did not hem the bottom.

Instead, I measured the length needed for the pouch and folded the fabric up once, then folded the same length again. This not only created a more durable pocket, but it also “lined” the inside of the pocket so you don’t see the backside of the fabric.

I cut four strips of ribbon, 12-inches each. I folded the length of the ribbon in half and attached it to the top of the sack. I double-stitched the ribbon so that it could withstand the weight of the books.

And that was it!

 I tied the ribbons around the chair backs.

These cute little seat sacks took me about 30 minutes! They solved my coloring book storage problem and they allow all the activities to be visible and accessible to the kids!

**These sacks will be available in Scissors & Spatulas’ Shop which is coming soon! Several colors and fabrics will be available. In the meantime, I can take orders via email! jen at scissorsandspatulas dot com.**

Are you ready to see if you won either of the $100 giveaways?

The winner of $100 from AMEX Serve is. . .

Michelle Alvin on  said:   I signed up for Serve!

And the $100 prize from Kodak Galleries goes to. . .
Congratulations to both of you! Not a bad after Christmas present, heh? Be sure to email me ASAP to claim your prize! {jen at scissorsandspatulas dot com}


Todays Creative Blog


Monogrammed Jingle Bell Shirt

Over the weekend the moms from our MOPS table got together for some laid back girl time. Of course there was a craft involved! Our group leader, Angie, came up with this adorable monogrammed t-shirt to make for the kids. Whether you are crafty or not, this one is SO easy, I promise! 
Not to mention, adorable! Don’t you think?
You’ll start with the fabric of your choice and an iron-on adhesive. This Christmas polka dot fabric is from Hobby Lobby. Cut just enough adhesive to cover the area you need for your letter or letters. Lay the shiny side of the paper on the back of the fabric. Run over the paper with a hot iron until is is attached to the fabric.

Cut out the letter or letters needed. You can do this a number of different ways: by hand {you can print out a letter on paper and then use it as a stencil}, using an electronic cutting machine or a die cut tool. Angie used the Ellison Die Cut from her daughter’s school. 

Peel away the backing of the adhesive and place your letter on the shirt where you’d like it. 

Hold a hot iron on the letter for 8-10 seconds and then smooth over it a few times.
Your letter should now be attached to the shirt!
Now don’t get scared of this part. Yes, sewing is involved, but it’s really just an up and down sew and you can’t mess it up since it can’t even be seen. 
You’ll sew on the jingle bells, one at a time, but close together. Just two stitches to attach each bell to the shirt. 

 Then thread the needle through all the bells and pull tightly to create a cluster. Do this a few times until the bells are secured.

That’s it! 

If you are making girls’ shirts, you can also add a bow. Attach the ribbon with a few stitches in the center. After the ribbon is attached you can tie it in a bow. Use clear fingernail polish to keep the ends from fraying.

It’s beginning to look a lot like Christmas!

I’m participating in the Christmas Pajama-rama Contest at Blissful and Domestic!

Plum Organics: Good For Babies (and Kids)

Thanks to Plum Organics for sponsoring my post about tips for baby feeding magic. What if you let baby choose what’s for dinner? Check out their cute “Quest for Yum!” video and see what happens!

Mommies, have you ever tried Plum Organics brand baby foods? These little baby food pouches were the greatest thing ever invented! They weren’t around {or at least that I knew of} when my first little guy was eating baby food which made traveling and outings messy and complicated! I discovered them with my second and they made my life so much easier. I love these things! More importantly, so does my little guy! He started eating these when he was about six months old. What first drew me to this brand was that the foods are organic. I am a firm believer in organic foods. Particularly fruits and veggies. The trouble is that the selection in “flavors” can be slim. When I found Plum Organics I was thrilled at the variety they offered. Flavors like pumpkin banana, blueberry pear and purple carrot and spinach peas and pears. But the true test came when I gave them a a little taste for myself {Yes, I’m one of those moms.}. Plum Organics baby foods were yummy! Really yummy! And Parker Reese thought so too. They were also great for feedings on the go. No jars, no drips, no mess, no clean up. They make feeding time so much easier.

So that was when Parker Reese was 6 months old. We just celebrated his second birthday and he still is eating these Plum Organic pouches! Why? Because he loves them and I love how healthy they are! And they are a great way to let him feed himself! No really, watch! 
I keep a stockpile of them in the pantry but they don’t last long! He often eats them for snacks. Hello, spinach and peas. Who wouldn’t want their little one to eat that for snack? Funny thing is, he thinks it’s a treat. I also give them to him before bed if he hasn’t eaten a good dinner so at least I know he has has little something good in him. 
So whether you have a teeny one, just starting to eat solids, a toddler or even a preschooler, you gotta get them some Plum Organics. They also have healthy foods and snacks designed for infants and toddlers {But who says they have to be babies to eat them?}. Go out and get some yummy {but healthy} Plum Organics!
*I have found a selection of Plum Organics at Babies ‘R’ Us, Buy Buy Baby and Target.*

This baby loves Plum Organics too! Check out this cute video about the healthy benefits of Plum Organics baby foods. 

 I was selected for this sponsorship by the Clever Girls Collective. To learn more about Plum Organics, visit their Facebook page http://www.facebook.com/PlumOrganics.

Back to School Chalkboard Lunchbox Tute & a Winner!

Can you believe that summer is coming to an end? Can you believe that it’s time to go back to school? Little Man #1 starts 3-year-old preschool today. He is going to a new school that blew me out of the water!
 {Remember, I’m a former preschool and kindergarten teacher so I’m picky.} We {mommy, daddy and Jack} are so excited!

Yeah, I’m excited, but look at him. So big, so fast. Only two more years and I’ll be taking him to kindergarten. I will be the boo hoo mommy, and that’s okay.

Anyway, back to the present. Are your kids ready for school? Are you ready? I was a kindergarten teacher and I know how apprehensive kids can be those first few weeks of school.

Today I’d like to share with you a cute and easy way to bring a smile to your child’s face by reminding them {halfway through the day} that you are thinking about them.

Start with a regular lunchbox
**If your child has an insulated lunchbox, see below for an alternative method.**

Tape around the edges of the lid and cover the rest of the lunch box with a plastic bag.

Use chalkboard spray paint to cover the inside of the lid. Once the first coat is dry, spray with a second coat and allow to dry overnight with the lid open.
**If your child has an insulated lunchbox: Cut a piece of vinyl to fit the inside of the lid. Before attaching, spray paint the vinyl with chalkboard paint. Allow the vinyl to dry overnight. Peel adhesive backing off and place on inside of lid. Use a flat edge to smooth out any bubbles.**

Get out your chalk and start writing. Any little message will put a smile on their face. Tell them what you will do together after school or just simply tell them you love them.

Now pack your baby a healthy lunch and send them off to school! They will be surprised {and maybe even relieved or reassured} at lunchtime when they open up their box and get a little reminder of how much you love them. šŸ˜‰

 I hope everyone enjoyed their summer vacation and I hope your little one’s first day back to school is a success!

Oh yeah, and the winner of the $25 Trendy Trinket credit is. . .

 Comment #9 Sara Pierce!

My favorite picture from the best day of my life!
Sara Pierce said…
“I like Scissors and Spatulas on Facebook!”

Congratulations Sara! 

Email me so I can pass your info along to TT! 

True Random Number Generator  9Powered by RANDOM.ORG

Guest Post: How to Sew Baby Romper by My Neighbor Kattie!

I’d like to introduce you to my neighbor Kattie! I recently found out that Kattie likes to sew. When she brought over this adorable baby girl romper I told her that I had to share it on my blog! Kattie does not have a blog {yet} but I thought this might be useful information for those of you who are new-to-sewing, or those like me, only know how to sew straight lines! Here’s Kattie!

To start my name is Kattie Casebolt and I love to craft, read, travel, and will try just about anything once.  I have always enjoyed crafting but never realized how much free time I had when I was single or married without children to appreciate it.  I started knitting when I found out I was pregnant with my first child and continued to knit for awhile.  The only problem is, knitting anything takes a lot longer to get a finished project and once I had children I found it hard to stop mid-stitch when they would start crying or wake up from a nap.  I had a very crafty friend (Sharon) who turned me on to sewing and what I could do with it.  My husband wanted to keep me happy since he had moved me to a new state with an infant and no family, so I bought my first sewing machine and made my first set of curtains and valances with the help of Sharon. I made a hat/scarf and mitten set for my niece, but after that my sewing machine found a closet and wasnā€™t touched again until about a year after my second child.  I have 2 small boys now and stay home with my children.  Some may ask, when in the world do you find time to sew.  Well my response would be in spurts and generally in the evening after the kids go to bed.  I find sewing to be a soothing activity, although when you get close to finishing a project it has made for a few late nights.  I love that I can generally get a completed project within a couple days depending on the size.  I have not been sewing long and had not touched my machine in quite some time, but I thought why not give it another try.  I am not creative, I love patterns, lucky for me, I had a friend who taught me to sew my first set of curtains and valances with a pattern and now I feel pretty comfortable with sewing.   I also love the challenge of doing new things and seeing what I can complete. 

 This featured project is a little girl romper with bloomers using the B5439 Butterick pattern along with the B5056 Butterick pattern for the hat.  Iā€™ll be honest, I had this pattern for a couple years before I actually felt brave enough to attempt it and when I first started, I really didnā€™t think it would turn out.  One thing I have learned is, make sure to look at the pattern before leaving the store and make sure you have everything you need.  It really stinks to get home and not have something.  Look at the notions, this will tell you what you need, like buttons, thread, elastic, interfacing, etc. I find salespeople really helpful when Iā€™m having a hard time finding something I havenā€™t used before, like the bias tape or the rick rack.  
To start make sure you read through the entire pattern instructions and get a feel for what to do, decide what version you would like to make and cut out those pieces. I did the criss-cross sundress with bloomers.  I then laid the pattern pieces on the fabric, pinned the pieces and cut.  
This was my first experience with rick rack which you place in the seam allowance of the pocket on the right side of the fabric and then you can hand stitch or use the machine to ā€œbasteā€ the rick rack in place. 

Next, fold right sides together and sew leaving an opening at the bottom of the pocket so you can turn it right side out.  You should see half of the rick rack sticking out. You will end up sewing the seam where you left the opening, the pattern says to slipstitch, I just pinned the pocket on the dress and top stitched so that the seam was hidden.

 I will tell you, I had to redo the pocket a couple times.  First, I didnā€™t like the rick rack I picked, then the second time my seam was hiding too much of the rick rack.  So donā€™t give up, you can do it.   I also placed back sections on at the same time, since I didnā€™t mind the extra bulk and it is more sewing time and less back and forth.  I try to do as many steps as I can so I can sew more at one time.  So I also sewed the lining at the same time.

  I then placed the rick rack on the dress in the seam allowance.  You are centering the rick rack in the 5/8ā€ seam allowance.  The goal is to have half of the rick rack showing when you are done sewing.  Once the rick rack is pinned in place either hand stitch or use the machine to baste the rick rack in place.   

 Put the lining and the dress fabric facing each other so when you look at it you see the wrong side. Sew along seam allowance leaving an opening so you can turn the dress right-side out.  I again top-stitched the dress opposed to slip-stitching.  I think it gives it a nice finished look. 

 This was  my first time dealing with buttons and buttonholes, but luckily my machine has an easy buttonhole function.  If you are new to buttons, you should see if your machine has this function with a special sewing foot, and practice on scrap fabric. This step made me very nervous, since you should have a completed dress at this point, except for the buttons, so if I messed this part up, I would have to start over.  Although, really you can rip out the stitching and try again if need be. I placed the marks on the fabric with a washable fabric pen using the pattern and then brought it to the machine.

 I then placed the buttons using the same thread from the machine and needle placing the button using the pattern.

You should now have a finished dress.

On to the bloomers.

Turn the raw edge at the bottom using the pattern as a guide, it is 3/8ā€, I use a metal sewing ruler with a sliding mark that allows me to keep a consistent seam.  You then need to take it to the iron and press, whenever it says to do this, it is an important step. It really makes it easier to sew.  You then place the rick rack so half of it is showing, since this will be the finished edge of the bloomers.  This was also my first time using bias tape.   Place the bias tape towards the bottom of the bloomers using the pattern for the placement. This is where the Ā¼ā€ elastic is going to go, use a pin to feed the elastic through.  I used stick pins to hold the elastic at the ends of the bias tape and then placed stitches in the ends to keep in place.  I do this for both sides at one time.  Once again, place the fabric with the right-sides touching and sew edges, it calls to sew the seam and then sew again in the seam allowance, Iā€™m assuming this is for strength.  Then press the seams to one side.  The seams that you just showed are the front and back.  The first time I got to this step I looked at my bloomers and thought, hmmm, how is this going to work out.  So if you place the seams together like I show in the picture,  you get an idea for what the bloomers look like.
 You can now stitch the inner thigh seam and have what looks like a pair of bloomers, but need to finish the waist. You will want to put a stitch at the seam on the bottom so that you have a finished look at the legs.

To form the waistline you want to turn the raw edge under, just like you did for the legs, but using a Ā¼ā€ this time.  Then press, turn it again Ā¾ā€, or 1ā€ if you are concerned about getting the elastic in and press again.  (See picture)  Stitch along the top edge all the way around and then stitch again at the lower edge, but leave an opening, this will allow you to insert the elastic. Take the elastic and sew it together so that you have a waist band, stitch the opening closed.

   Bloomers finished!
Now if you arenā€™t bored to death yet, you can start the hat.  The included pattern is fine and almost exactly the same, but I felt the hat pattern had better sizing for what I wanted.  

You are going to cut your pieces out and cut the interfacing out (where they show triangles on the pattern, cut the triangle out in the fabric). The interfacing is going to give your hat more stability and shape.  I used fusible interfacing, so it needs to be ironed on using a wet cloth and hot iron. 
Once you have interfaced the pieces, you will pin and sew using the seam allowances given in the pattern. Pin the sides and front together, and sides and back together, using the arrows from the pattern.  You will then pin the  two pieces together and sew. Pin the brim, sew the seam, put right sides together, sew, turn and press. Sew the inside seam of the brim and then attach to the crown of the hat.  You can clip the brim just do not go over the seam allowance and this will help to give a smooth line.  
I decided to use a matching brim, opposed to using a different fabric, but I did do the bottom side of the brim in the contrast fabric.  I also chose to line the hat with the contrasting fabric, which the pattern did not call for.  
When lining the hat you are just using the same crown pieces and cutting it in the contrast fabric.  It is almost like creating another hat, but worth the extra effort.   Instead of hand stitching I placed the lining in the hat after I pressed a Ā¼ā€ seam in to hide the raw edge.  I then brought it to the machine and it created a topstitch on the hat, which I then topstitched the brim.  You now have a completed hat!
Congrats, you have completed a great outfit, I have now made two of them as gifts, and canā€™t wait to get started on my next project. I hope this gives you the courage to try something maybe a little out of your crafting comfort, it really is rewarding in the end.

Guest Post: DIY Play Kitchen from The Family Connection

Hello fellow crafters!  My name is Bonnie, I am a SAHM and a DIY crafter.  I blog over at The Family Connection where you’ll often find me blogging about my family, crafts and photography.  I’m very excited to be here at Scissors and Spatulas!  I’m going to share my latest creation today and I’ll start by giving you a before and after shot of this “re-purposed entertainment center.”

I brought home an entertainment center that someone “junked” and got to work!  I first sanded down the entire unit (with my daughter’s help of course) and removed the cardboard backing.

I went to the lumbar yard and bought a sheet of particle board for the shelves, backing, and doors.  I measured everything out, twice!

My pop was kind enough to help me with some of my cuts, and YES I did do some of the cuts myself!

Next, using my jig saw I cut a hole out for the sink, attached the back, and primed the entire unit.
I applied many coats to the kitchen with some left-over paint we had from repainting our house two years ago, and began the assembly!  I attched the doors and shelves first and installed the faucet and sink (which is just a stainless steel mixing bowl), handles (Lowe’s), utensil rack (Ikea), stovetop dials (which I failed to take a close up of, but also from Ikea), and an apron hanger on the left side (not visible, also from Ikea).

Then came the revealing of the kitchen to my girls, can you tell they were excited??

I had my mother teach me how to sew some curtains and hung a mirror above the sink (per my oldest’s request).
*Please excuse the clutter of toys around the kitchen, I interrupted playtime for this shot* 

This was an extremely inexpensive gift to make, but very time consuming for me (especially the painting!).  The only things I spent money on were the handles, utensil rack, apron hanger, and a sheet of particle board.  I had the paint, faucet, and “sink” already.  Total coast?  Around $30!  Hopefully this will last the girls a long time.
Thanks for reading, happy crafting! Be sure to stop by my blog, The Family Connection!


Easy Peasy Monogrammed Water Bottles

It”s summer and HOT here in SC! We are always on the go and spend a lot of time at the YMCA and at the pool. I wanted some kind of container for the boys to carry water along wherever we go. Just something I could fill with lots of ice and water to keep it cool while on the run. I found these cute little water bottles at the Dollar Tree yesterday. 

Nothing wrong with them. But of course, you know me, I’ve got to add my own little touch.

I pulled out my newest toy, the Silhouette SD. {Love this thing!}
A couple weeks ago, Pick Your Plum had a special on outdoor vinyl. If you haven’t heard of PYP, you have to go visit. Each morning they offer spectacular deals on crafty and creative items. The catch is that they only have a certain number of the daily special and they tend to sell out fast! Anyway, I was lucky enough to get two sets of this outdoor vinyl. After I bought the bottles, I thought it might work well to label them with a decorative touch. And, since it is meant to withstand the outdoor weather, I figured it would hold up well in the sink. 
So I cut out the letters and stuck them on the bottles! It took about five minutes! Easy peasy! 
And even though the boys picked out the color they wanted and know which bottle is theirs. . . 
the monogram makes them just a little cuter! 
This week I’m linking up to these fabulous parties:

Todays Creative Blog


Little Changes for a "Big Boy"

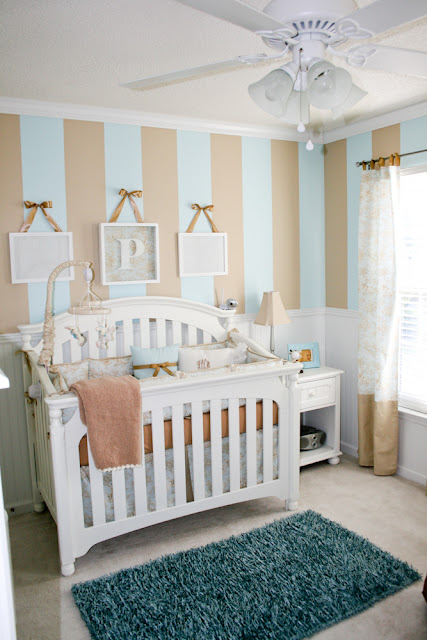
A little over a month ago I shared with you, in this post my second little man Parker’s nursery.

I absolutely love his room. In fact, it’s probably my favorite in the house. Unfortunately, Parker is 18 months old and quickly outgrowing this nursery! As beautiful as it is, it’s not exactly decorated for a “big boy.” But I’m not ready to change the decor yet! So I’m doing my best to add and change a few things around his room to make it a little more appropriate for his age with out having to sacrifice the decor. 

I started with this. . .
A cute little work table. Every growing kid needs a table or desk of some sort for reading, coloring, etc.
Before: 

  This little table was made out of an old bedside table my parents had in their house forever. My dad cut the legs down to make it a kid-size table for the playroom at their house. It was handed down to me last year and has been sitting in the attic. The chair is an antique, also given to me by my mom.
I used my handy-dandy mouse sander on the table to take off some paint {this table had layers of it}. I used it on the chair to rough it up to help the paint stick.  I rubbed wax from a candle along some of the corners and edges of areas that I wanted to look distressed.
I used a sponge roller to apply one coat of white semi-gloss paint. Then I did some more sanding for a distressed look. Actually I ended up sanding a lot more than I had planned on. My new tool is fun and I got a little carried away!
This is what they looked like after painting and distressing. I also added some distress ink to both pieces just to add a little extra “age.”
After:

And here it is! 
Perfect size for the little guy! Most important, I think he likes it!
Before                                                                               After