Pretty Things Thursday Linky #13

Is it Thursday? Hmmm, I guess it is! Did I forget to put up this week’s PTT? Yes I did!

Guess it’s better late than never, right???
Here a couple quick picks from last week…

I can’t get enough of pumpkin-flavored stuff! (Except those pumpkin pie Hershey Kisses. They are awful! Awful!) But these Pumpkin Pie Pancakes with Pumpkin Whipped Cream from The Clever Pink Pirate sound and look delish!
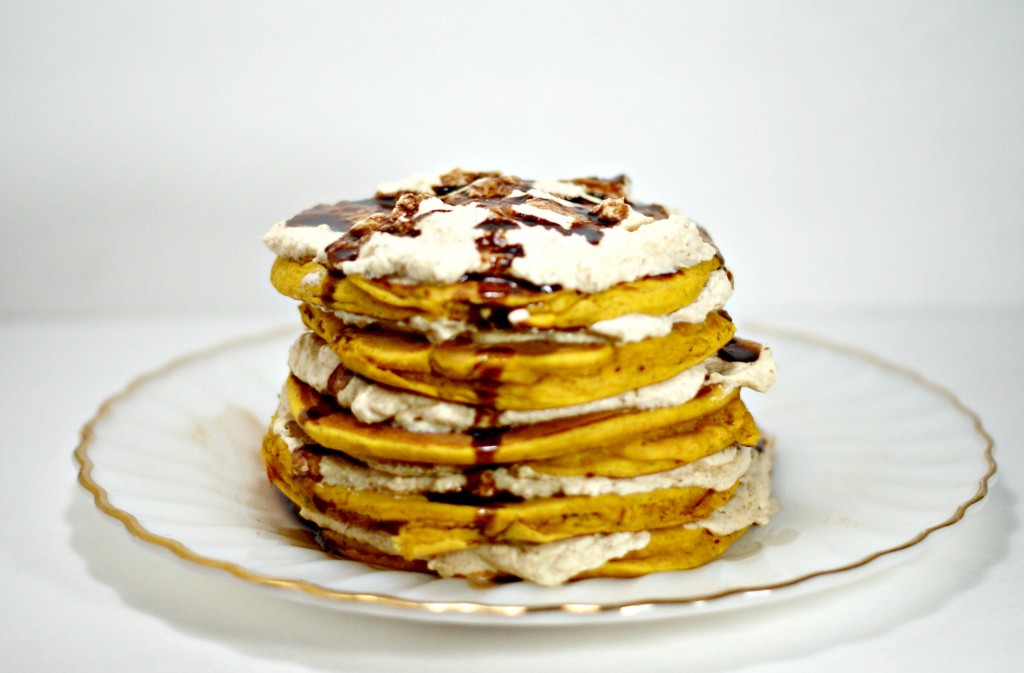
Pumpkin Pie Pancakes Cake w/ Pumpkin Whipped Cream via www.cleverpinkpirate.com

Check out how cute and simple this Wooden Height Chart by Twigg Studios.

And this fall tablescape by Crafty Scrappy Happy! Simple, yet elegant  Stop by for the tutorial for the placemats too!

This Luminary Ghost is too clever! Go find out how to make your own at Kaminski’s Creations.

Ok, I’m ready to see what you’ve come up with this week! Are you ready to share your pretties? I’m sure you remember the rules…

1. Please link YOUR projects, tutorials, tips, etc. that have not already been shared at Pretty Things Thursday.
2. DO NOT link any posts that include giveaways, things you are selling or other link parties.
3. Please put a link (text or button) back to Scissors & Spatulas and Johnny In A Dress somewhere on your blog!
4. Visit other links and leave LOTS of sweet comments!
OHHHH, and seriously people…go enter the Designed Beginnings giveaway! $40 credit to the store and the entries are few which means your chances are big! You can enter up to 6 times! Go here now!


Decorated Halloween Branches

 I kept my Halloween decorations to a minimum this year since our house is currently on the market. Did I tell y’all that, by the way? Yes, the house went on the market! Anyway, as much as I love decorating for Halloween (and fall in general), I kept it minimal for staging purposes. I hate my house being staged. It doesn’t feel like my house.

halloween branches with paper ornaments

But I did create this little vignette on my kitchen sideboard.
The weather here in SC has been gorgeous! I sent the boys into the woods in our back yard and asked them to find me some big branches. Of course this was not a difficult task for them! They love collecting sticks!

I spray painted the branches with some black spray paint I had in the garage.

During the process of turning and drying each side, I made the “ornaments.” I already had made some of these rosettes for a holiday craft party I had for the neighbors. I used Stampin Up designer series paper, punches and the Designer Rosette Bigz Cutting Die to create the accordion folded rosettes. (order rosette die here) I basically layered the different pieces using the coordinating papers from Stampin Up. (They make it so easy!)

halloween rosette howlstooth scaringbone stampin up

I used Howlstooth and Scaringbone designer series paper for these two. I LOVE this paper! It is darling for Fall and halloween, but can also be used any time of the year! You can order it here.

halloween rosette howlstooth scaringbone stampin up

  These next two are made from Stampin Up’s Wicked Fun designer series paper, which, by the way, is on clearance for an excellent deal! Order it here.stampin up wicked fun halloween rosette

This ornament also uses the Lifestyle Crafts Lattice Doily cutting die.

lifestyle craft delicate doily die cut halloween ornament

I also used this skeleton cutting die from Lifestyle Crafts Tricks ‘n Treats collection.

lifestyle crafts skeleton die cut

Once I started assembling it, I realized that it would be a great activity for the boys!

lifestyle crafts skeleton die cut

So I cut two more sets and told them to see if they could build a skeleton.

I let them do it on their own first and I was pretty surprised at how well they did! But then I let them use mine as a model to glue their pieces to the paper.

lifestyle crafts skeleton die cut

lifestyle crafts skeleton die cut

My skeleton got some ribbon and some distressing and was hung on my tree with the rosettes.

lifestyle crafts skeleton cutting die

And here are all the “ornaments” all together on the branches.

halloween branches with paper ornaments

My little corner of Halloween!

Hey, have you entered to win the Designed Beginnings store credit? You could win a $40 store credit to use on anything  you want! Don’t miss out! YOu have until Friday, October 19 to enter! Just click here.

Wall Decal Giveaway from Designed Beginnings

Check out this nursery…

Isn’t the wall decal adorable?
Today I’m excited to announce a giveaway from one of Scissors and Spatulas’ newest sponsors!

Designed Beginnings creates nursery wall decals, growth charts, and adorable wall stickers to decorate any child’s room. I love the fun look of these numbers & circles wall decal!

And the growth charts are too cute! What a great way to keep track of the littles’ growth!

Let me introduce you to Ragan, Designed Beginnings shop owner…

 “I am a graphic designer and decided to be a stay at home mom 3 1/2 years ago when my first baby was born. I now have two boys and one on the way. I began doing selling wall decals on etsy 3 years ago and it has been a lot of fun designing new decals for people.”

Vinyl decals are an easy and affordable way to change the look of any room. The wall decals are easy to install and remove. All vinyl decals are matte, which makes it look more like paint. The matte vinyl adhesive is removable and won’t ruin your paint.

Owls, giraffes, elephants, sports, flowers and more, Designed Beginnings has a wall decal to match any room! Ragan can also create personalized wall decals!

Ragan wants to offer one of Scissors & Spatulas’ readers a $40 credit to Designed Beginnings!!! Hip hip hooray! What a way to start your week, right?!

How to enter to win a $40 Credit to Designed Beginnings:
1. REQUIRED: Visit Designed Beginnings and leave a comment here telling me what you would buy if you win.
2. Like Designed Beginnings Shop and leave a comment here to let me know.
3. Like Scissors & Spatulas on Facebook and leave a comment telling me you did.
4. Like Designed Beginnings on Facebook and leave a comment letting me know you did.
5. Share this giveaway on Facebook and/or Twitter and leave a separate comment for each.
The giveaway starts now and will run until Friday evening (Oct. 19). The winner will be announced the following morning.
Ready, set, ENTER!

Pretty Things Thursday #12

Whew, things have been crazy around here lately! Yes, I took a little more than a week off. But I have great news! We chose a builder for our new house and (this is bittersweet news) our current house is on the market!
Okay, enough about me….What have you been up to?

Ready to show us what you got?

Don’t forget the RULES…

1. Please link YOUR projects, tutorials, tips, etc. that have not already been shared at Pretty Things Thursday.
2. DO NOT link any posts that include giveaways, things you are selling or other link parties.
3. Please put a link (text or button) back to Scissors & Spatulas and Johnny In A Dress somewhere on your blog!
4. Visit other links and leave LOTS of sweet comments!


Pickin’ Apples

We recently took our annual fall road trip to Sky Top Apple Orchard in the mountains of North Carolina.

This was our third year at the orchard but this was the first time we were actually able to pick apples. The past two years we have gone too late in the season and the trees were picked over.

We made it a family trip and took my mother-in-law and met my sister-in-law and nieces who live closer to the orchard.
I just wanted to share a few pictures with you.

We had a blast!

Pretty Things Thursday #12

It’s Thursday again already and that means it’s time for you to link up your pretties!

Thanks to everyone who linked up! Y’all give me so much great stuff it’s hard to choose! Here are just a couple of my faves from last week!

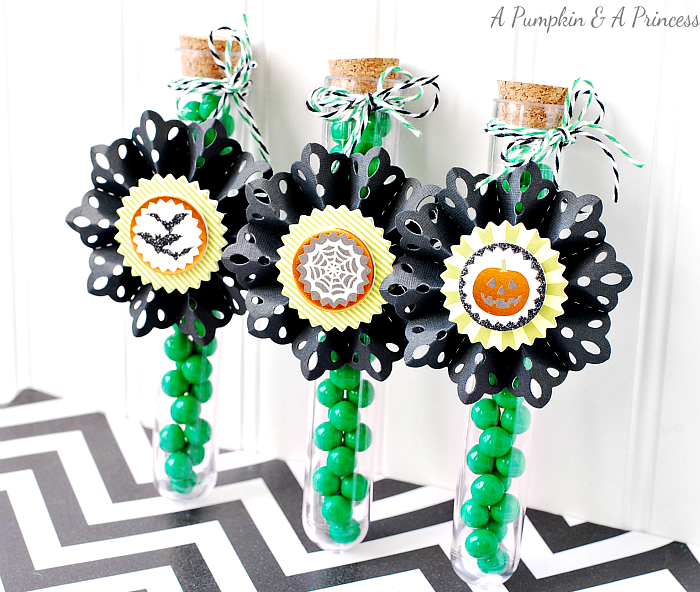
Check out these Halloween candy test tubes from A Pumpkin & a Princess. Too cute!

Halloween Treats: Candy Tubes

This caramel apple munch mix sounds so yummy! Stop by Shaken Together for the recipe.

Check out this clock turned mirror from Pressing On. Very clever upcycle!

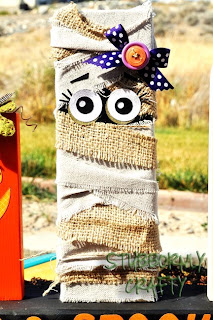
Stubbornly Crafty used 2x4s to create some really cute Halloween characters. This mummy was my favorite! Stop by the blog to see the rest.

If you’re looking for a free fall printable, stop over to A Night Owl and grab one!

Thanks again for sharing all your pretties last week! I can’t wait to see what you have for us this week!

Please follow the RULES…

1. Please link YOUR projects, tutorials, tips, etc. that have not already been shared at Pretty Things Thursday.
2. DO NOT link any posts that include giveaways, things you are selling or other link parties.
3. Please put a link (text or button) back to Scissors & Spatulas and Johnny In A Dress somewhere on your blog!
4. Visit other links and leave LOTS of sweet comments!


Shelf Reliance & THRIVE Foods with Carolina Food Storage

Today I’m excited to tell you about one of Scissors and Spatulas’ newest sponsors! Carolina Food Storage is a website and online store dedicated to improving and maintaining the quality of food while eliminating waste caused by tossing expired foods.
I don’t know about you, but when I clean out my pantry I end up throwing out a garbage can full of unused, unopened food because it has expired. Money down the drain! Using the Shelf Reliance food rotation system in combination with freeze dried foods, this waste can be eliminated. Now I know you are thinking, “Freeze dried foods? No thank you!” But really, you gotta take a look at these.
THRIVE foods offers the same food that you use every day and would typically buy from the grocery store with the advantage of a longer shelf life. Thrive products are all natural and free of harmful preservatives and additives. And the best part…all the work has been done for you! No dicing, chopping peeling, etc! If you still don’t believe me, take a look at some of the recipes they have available here.
 

 When combined with the Food Rotation Systems, THRIVE foods are constantly rotated on a first in first out basis.  This guarantees your family receives the freshest food possible and helps reduce waste.

Now let me introduce you to the founder of Carolina Food Storage.
Meet Leigh Ann…
…………………………………………………………………………………………………………
For years my husband has wanted to start a food storage system.  We really didnt know where to start and what to buy.  We stocked up on various canned foods that we never seemed to want to eat on a daily basis and they eventually expired and were thrown out.  I set out on a search to find a system that would work for us and was so excited when I found Shelf Reliance!  The selection and quality of the food is better than anything I had tried in the past.  With a shelf life of 25 years on most items, I knew that we wouldn’t waste our hard earned money on food that is thrown away.  Shelf Reliance has all of the foods that you normally shop for at the grocery store, fruits, veggies, grains, meats and dairy all with an extended shelf life.  Shelf Reliance also helps me save time, I don’t have to run to the grocery store as often and I don’t have to spend extra time in the kitchen chopping and browning because it has all been done for me!
Shelf Reliance THRIVE Freeze Dried Foods are great for:
* Quick Everyday Meals
* Emergency Food Supplies 
* Camping Trips
* Dorm Rooms
* Vacation Homes

Since our foods do not require refrigeration and have an extended shelf life the possibilities are endless!
……………………………………………………………………………………………………………
Head on over to Carolina Food Storage now and take a look. It’s a pretty cool concept to help save money and eliminate waste while eating well at the same time! Also stop by their Facebook page where you can find lots of new recipes, deals, and other information.


Fun Fall Peanut Butter Cereal Treats

peanut butter cereal fall halloween treats

I found the recipe for these bars last year in a magazine. I can’t remember which one. I thought they were really cute for a fall treat and the recipe sounded yummy. Plus they are simple enough that the kiddos can help. They are basically Rice Krispy treats using a different cereal and adding peanut butter and M&Ms. I found these red, brown and yellow ones for fall. If you can’t find them, you can always use regular and take out the blue and green.

You’ll need: 30 large marshmallows, 3 Tbsp butter, 1 Tbsp peanut butter, 6 cups Cap’n Crunch peanut butter cereal, and 1 cup M&Ms.

Add marshmallows, butter and peanut butter to a large saucepan.

Cook on medium heat, stirring often, until melted and combined.

Add the cereal…

and M&Ms…

and stir, just until combined. Don’t over stir because the M&Ms will start melting and breaking.

Transfer mixture to a greased 9×13-inch pan. Press firmly to cover bottom of pan.

Allow to cool and then serve!
I decided to cut them into bite-size squares and serve them on a lollipop stick!

peanut butter cereal fall halloween treats

YUM!

peanut butter cereal fall halloween treats

A Few Fall Recipes {Revisited}

Fall is officially here! That means pumpkins, apples and spice! I love fall flavors!
Today I’m revisiting a few of my favorite recipes that I’ve shared with you in the past. Enjoy!
pumpkin pie dip scissors and spatulas
  This dip is soooo good! And you can make a fun fall presentation by serving it out of a pumpkin! I wish I could call it my own, but I got it from Southern Living.
It’s very easy.

Recipe for Pumpkin Pie Dip 

pumpkin treats scissors and spatulas
These little guys may be tiny but they are pure deliciousness! Not to mention, adorable!
And they are simple enough that the kiddos can help!
You can get the recipe here.
apple brown betty recipe scissors and spatulas
It’s apple season! We always head up to the mountains to do some apple picking. This recipe uses both fresh apples and apple cider.
You can get the recipe here.
pumpkin chili scissors & spatulas

I have to say I was a bit skeptical of this recipe at first. But I’ll try anything once, so I went for it. So glad I did! The pumpkin gave the chili a rich, nutty flavor.

The ingredients are pretty basic. You can find the measurements here. The recipe calls for 2 jalapenos but I didn’t even use a whole one. I used white kidney beans (cannellni beans) because I thought they would go better with turkey than dark kidney beans. I also used fire roasted diced tomatoes because I really like the flavor.

Happy fall y’all!

Parker’s Lego Birthday

Last Saturday we celebrated Parker Reese’s third birthday. It’s hard to believe my sweet little monkey is three already!

The child’s two favorite things are Legos and Star Wars so Of course he chose a Lego themed party. I was actually pretty excited about this. I knew it would be a fun (and easy) theme to work with.

I started with Lego invitations that I found on Pinterest. I created the invitation using the Silhouette software. I downloaded a Lego font that I found on the Internet and just changed the color of the letters and I used a wooden stamp for the party information. I cut red, yellow and blue card stock into rectangles (about 3×5 inches) and used a 1-inch punch for the circles. Dimensionals were used under the circles to give it the 3-D look.

Lego birthday invitations cards

The decorations were simple. I bought lots of red, yellow and blue balloons and tied them around the room. I made this banner using my silhouette, some lego scrapbook paper I found at the craft store and an image I found online.

lego birthday banner

lego birthday bannerlego birthday banner

The table spread was also simple. I used a big Lego head in the center of the table and tied lots of balloons to it (they hadn’t arrived yet when I took the photo). I added some color using vases of candy (blue Sixlets, Twizzlers and Lemonheads) and, of course, Legos!

lego birthday party decor

I really wish I had gotten a better picture of the cake. It was three sections (red, yellow and blue) stacked. My friend Cristy (who made Parker’s adorable hay bale cake last year)

lego cake birthday

 I was lucky enough to find someone local that did Lego parties. Bricks 4 Kidz was great! During the party, the kids got to build they’re own mini figuring, participate in races, games, scavenger hunts and more!

For party favors I ordered a bunch of lego candy (2 lbs!) and random Lego pieces (500!).
Each child got to take home a candy favor. I used cellophane bags and the Lego paper to make the candy favors. 

lego candy party favor birthday

I had hubby and the boys custom build each child a figure using the Lego pieces. They turned out pretty interesting! The kids also got to take home their mini figurine they created during the party.

lego party favors

Happy third birthday to the kid who loves trying on my shoes,

 loves making people laugh,

always keeps us on our toes,

but is still the sweetest little guy in the world!