Parker’s Lego Birthday

Last Saturday we celebrated Parker Reese’s third birthday. It’s hard to believe my sweet little monkey is three already!

The child’s two favorite things are Legos and Star Wars so Of course he chose a Lego themed party. I was actually pretty excited about this. I knew it would be a fun (and easy) theme to work with.

I started with Lego invitations that I found on Pinterest. I created the invitation using the Silhouette software. I downloaded a Lego font that I found on the Internet and just changed the color of the letters and I used a wooden stamp for the party information. I cut red, yellow and blue card stock into rectangles (about 3×5 inches) and used a 1-inch punch for the circles. Dimensionals were used under the circles to give it the 3-D look.

Lego birthday invitations cards

The decorations were simple. I bought lots of red, yellow and blue balloons and tied them around the room. I made this banner using my silhouette, some lego scrapbook paper I found at the craft store and an image I found online.

lego birthday banner

lego birthday bannerlego birthday banner

The table spread was also simple. I used a big Lego head in the center of the table and tied lots of balloons to it (they hadn’t arrived yet when I took the photo). I added some color using vases of candy (blue Sixlets, Twizzlers and Lemonheads) and, of course, Legos!

lego birthday party decor

I really wish I had gotten a better picture of the cake. It was three sections (red, yellow and blue) stacked. My friend Cristy (who made Parker’s adorable hay bale cake last year)

lego cake birthday

 I was lucky enough to find someone local that did Lego parties. Bricks 4 Kidz was great! During the party, the kids got to build they’re own mini figuring, participate in races, games, scavenger hunts and more!

For party favors I ordered a bunch of lego candy (2 lbs!) and random Lego pieces (500!).
Each child got to take home a candy favor. I used cellophane bags and the Lego paper to make the candy favors. 

lego candy party favor birthday

I had hubby and the boys custom build each child a figure using the Lego pieces. They turned out pretty interesting! The kids also got to take home their mini figurine they created during the party.

lego party favors

Happy third birthday to the kid who loves trying on my shoes,

 loves making people laugh,

always keeps us on our toes,

but is still the sweetest little guy in the world!

"She’s Ready to Pop" Again!

Eeeek! I’m so excited!
Do you remember my post back in April for the “She’s Ready to Pop” baby shower favors?
Well, I have gotten more comments and questions about these favors than all my posts put together! {Okay, a bit of an exaggeration, but I have had A LOT of inquiries.} I originally found these boxes at Hobby Lobby, but that was back in April. I have had so many people write me saying that they either do not have a Hobby Lobby or could not find them at their Hobby Lobby. I offered to buy the boxes an ship them, but my HL no longer carries them either. So I came up with a different solution. . .
I will make them and sell them in my shop!
{the shop is still in the works}
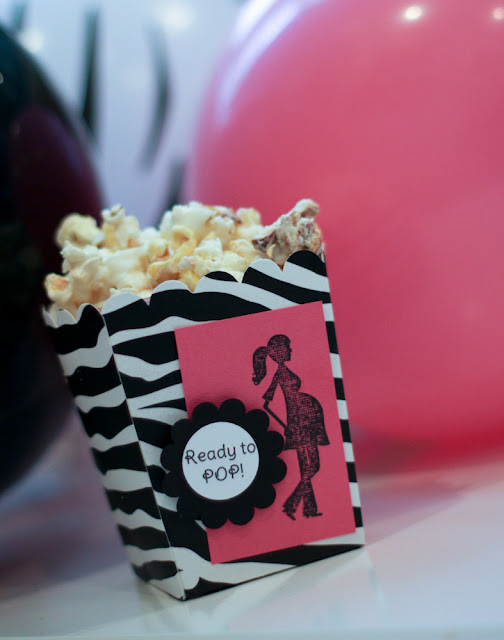
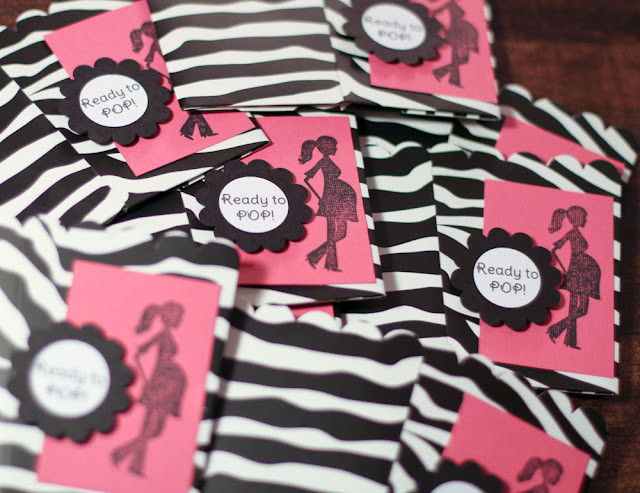
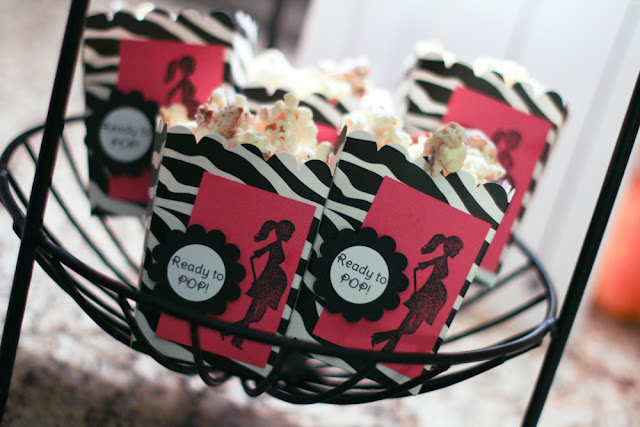
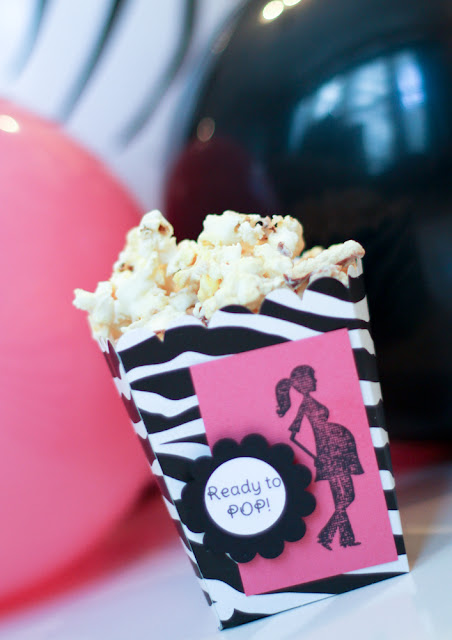
These I made for a small shower I had for my friend Rebecca. She is having a baby girl, but I didn’t want to use the typical pastel pinks. I decided to use a fun, more exciting theme of hot pink, black and white zebra. That’s the best news about this item. It can be customized to fit your party’s theme and decor!
That’s right, you tell me your colors and theme as well as any preferences you have for the favor boxes and I’ll ship them to you flat but assembled. All you have to do is pop the boxes into their upright position and fill them with your favorite popcorn snack.
I recommend my recipe for white chocolate popcorn. You can jazz it up by adding any extras you want to fit the color scheme. I used M&Ms in my first batch but this time I added chunks of pretzels.
These favors are a hit! They are cute and yummy and everyone loves them!
I hope to have my shop up and running soon. Until then, you can find more information about these boxes under my shop page.
And don’t forget about Shabby Apple’s 12 Days of Christmas! On the third day of Christmas, Shabby Apple gave to me. . .
This Tambourin Skirt at 25% off! Enter ‘Day3’ in checkout!
Don’t forget to check out Shabby Apple‘s newest line, Tinsel Town!

Howdy Y’all! A Cowboy Birthday Party (and winner)

On Sunday we celebrated Little Man #2’s second birthday with a cowboy party on the farm.
I found this great little farm just down the road from our house that does birthday parties. The kids enjoyed all the activities that the farm provided and I had fun putting together all the party decor! 
The birthday boy, Parker Reese, was dressed like a cowboy from head to toe!
This place was so much fun!

The farm had many friendly animals that the children were able to pet and feed. Horses, goats, bunnies and a turkey were just a few. They even got to brush the little pony. . .
before taking a ride!

There were swings and slides and a trampoline.

And horseshoes for painting.
When birthday guests arrived they were greeted with a little note. 
“Howdy Y’all! Don’t forget your cowboy and cowgirl gear!”
We provided the kiddos with cowboy hats, bandanas and badges which I purchased from Oriental Trading Co. 
I chose to use a western/cowboy/farm theme with red and black paisley, black and white cow print and blue denim. I purchased all the fabric, balloons and paper products at Hobby Lobby.
We had lots of yummy farm food!
“Chicken Feed” served in cups.
{pretzels, raisins, chocolate chips, M&Ms, marshmallows and peanuts}
“Pigs in a Blanket”

“Cowboy Crunchies” {veggie chips}

“Slop”
{grapes, apples, bananas and mandarin oranges}
“Carrot Sticks and Ranch Dressing”
Parker’s friends and cousins had fun! 

Parker Reese and his best girl friend Addison!
{We are determined to have them married one day.}
My cuties, Jackson and Parker Reese.

And the adorable haystack cake made by our friend Cristy. {You may remember, she made the amazing “Grillin and Chillin” back in May} Let me just say that this cake was not only adorable, it tasted SO good! 

The boys agreed! 
 Everyone had so much fun!
Thank you so much Barnyard Celebrations in Fort Mill, SC for letting us play!
And because I can’t resist. . .

Parker on his new bike that he found when he woke up the morning of his birthday. He hasn’t gotten of since!

Oh yeah, and the winner of the UPrinting giveaway is. . . 

Amber Wilkie said…

Ooh yeah gotta love personalized stationery. Thanks!
Congratulations Amber! Please email me claim your prize. 
jen @ scissorsandspatulas dot com


Linking up here:
http://www.scissorsandspatulas.com/p/link-parties.html

Todays Creative Blog

Grillin’ & Chillin’ Cake

Whew! It was a crazy busy weekend! Saturday I was busy garage saling and Sunday I was busy preparing for a shower for some friends getting married at the end of the month. It was a couples shower with the theme “Grillin’ and Chillin'” and we had a blast! We even had a surprise visitor. Our BFF Melly who lives in Chicago made a surprise appearance. It was an evening filled with good food, good friends and good times to celebrate an upcoming marriage! What I want to show you from this party was the cake. 
Isn’t it fabulous and adorable! I cannot take credit for this one. A friend graciously took the time to make it for us. Thanks Cristy! Take a closer look. . .
The layered chocolate cake was a grill with burger patties {rice cakes sprayed with red food coloring} and even burning charcoal inside {marshmallows covered in icing and sprinkles}.
The tray of mini sliders were white cupcakes with a slice of chocolate in the center, covered in yellow/orange icing. And my favorite was the corn on the cob cupcakes covered in jelly beans and a banana Laffy Taffy! Not only did this cake look awesome, but it tasted amazing! Thank you, thank Cristy! This was the hit of the party!

How to Make a Tissue Pom Pom

What’s the newest trend in party decor? Tissue pom poms, of course! Even Martha Stewart has labelled these a “good thing.”
Martha’s:
{photo courtesy Martha Stewart}


Mine:

These pom poms make a big impact and are an inexpensive decoration for any party! The best part, they are so easy to make! I used the tutorial found on Martha’s site as I made mine. 
I found my tissue paper at Target. They have a really fun assortment of colors for $1.99 per pack. I’m sure your local dollar store has them for even less!
First you have to decide what size flowers you want. I wanted two different sizes so I cut the pink tissue in half and the blue in fourths.

After you’ve cut the paper to size, stack the paper evenly, one sheet atop another {as it is packaged}. You’ll want between six and eight sheets. Begin folding, back and forth, accordion-style. Once you have folded the tissue, secure  it in the middle using string or wire. If you use string, be sure to leave enough excess so that you can hang it.

Cut the ends of the tissue in the desired shape {round, angled, etc.} Then spread out the tissue so it looks like a fan. 

Beginning in the center, separate the layers of tissue paper, pulling them apart to “fluff” your flower.

Hang the pom poms at different lengths in a cluster or individually around the room.

Aren’t these FUN!

She’s Ready to Pop!

ready to pop baby shower popcorn favor box
While I was away at Creative Estates, my friends and I {even though I wasn’t actually present} hosted a baby shower for my dear friend, Cindi. Since I was going to be gone, I was in charge of items that could be bought and prepared ahead of time. One of my duties: the party favors.
Dun dun dun. . .
{horror sound effect}
Now, I am a creative person. But favors can be hard! I didn’t want to do the same old same old. So I had no idea what I was going to do, until one day I went to Hobby Lobby {What? Me? At HL, you say? I know, crazy!}. So anyway, I was at HL and saw these little favor boxes.
So cute! And they are shaped like movie popcorn boxes! But of course I wasn’t going to fill them with regular old buttered popcorn. . .
Instead, I made this:
Ready to Pop, White Chocolate Popcorn Mix!

Here’s how. . .

3 easy ingredients: popcorn, premier white chocolate morsels, M&Ms.
Melt one bag of white chocolate in microwave at 75% power for 3 minutes, stirring every 30 seconds, just until melted.
Add half of popcorn and one bag of candy to a large bowl.
 {Unless you have a REALLY large bowl, you’ll need to make the mix in two separate batches}
Pour a small amount of melted white chocolate over the popcorn and candy and stir.
Repeat several times until popcorn is generously coated in chocolate {about 2/3 of melted chocolate}. Be sure to save some to drizzle on top.
Pour popcorn mix on a cookie sheet lined with wax paper. Using a spoon drizzle remaining melted chocolate over popcorn.
Let the popcorn mix harden for about an hour and store in an air-tight container until ready to use.
Is you mouth watering yet?  This stuff is good! I was kind of sad to give it all away!

The favors:

Aren’t they darling?!
And delish!
Ready to Pop, White Chocolate Popcorn Mix!
3 bags microwave popcorn, popped
2 – 12 oz. packages premier white chocolate morsels
2 – 12.6 oz. bags chocolate coated candies (such as M&Ms)
Mix half of popcorn {1- 1/2 bags} and 1 bag of candy in a large bowl. Melt 1 bag white chocolate morsels in microwave at 75% power for 3 minutes, stirring every 30 seconds, until melted. CAREFUL NOT TO BURN!!! Pour a small amount of chocolate over popcorn and stir to coat. Continue adding chocolate, a little at a time, until popcorn mix is fully coated. You will use about 2/3 of the white chocolate.
Spread popcorn mixture on a cookie sheet lined with wax paper. Using a spoon, drizzle remaining white chocolate over popcorn. Allow to cool for 1 hour before breaking popcorn mix into large chunks.
Repeat with remaining popcorn, candy and white chocolate.
Yield: about 20 cups popcorn mix.
………………………………………………………………………………………………………………………………..
YES, you can order these for your shower now! Stop by either of my shops to place your “Ready to Pop” order now! don’t see what you want? I can create custom orders to match any theme or decor!

Argh Matey, Pirate Cupcakes

Aren’t these pirate cupcakes darling? 
I can’t take too much credit for these. I borrowed the idea from a friend. But they turned out so cute that I just had to share. 
Use any flavor for the cake and bake according to the package. My little guy picked chocolate. I found several different pirate theme liner cups (Hobby Lobby, Michael’s and Party City) but chose gold because it matched the gold coins and jewelry I used for party decor. 

I used a tub of white buttercream frosting and added just a couple spoonfuls of milk chocolate frosting to make a flesh-like color. I mixed it using a hand mixer.

Frost the cupcakes.
Pour chocolate sprinkles onto a small plate or shallow bowl.
Pressing lightly, roll 1/2 the iced cupcake in the sprinkles so that they cover the bottom and slightly up the sides of the cupcake.
There’s the scruffy beard! 

I used vanilla frosting in my Pampered Chef Easy Accent Decorator for the whites of the eyes. 

Red icing is too hard to make, so I used a can of red cupcake icing for the bandanas then added white polka dots with the vanilla icing using the PC decorator.
You could use any small, round candy, but we chose chocolate chips for the eyeballs. Then used the red icing for the mouth.
Cute and yummy!