Apple and Fennel Salad Recipe

Well, it took 2 days but I finally found my the cord to download my photos from camera to computer! Jeesh! Sorry for the delay on sharing the Apple and Fennel Salad recipe I mentioned the other day.

apple

Anywhooo, it’s apple season! One of my favorite things about fall is the flavors. I’m talking about apple, cinnamon and pumpkin. We normally go apple picking at least once in the fall. The kids love it and it gives us an excuse to visit the mountains. But somehow we always come home with too many apples so I have to find recipes to use them up. This one I tore out of Southern Living in September 2010. And yes, I just now got around to making it! But I’m glad I did because it was yummy!

IMG_5413

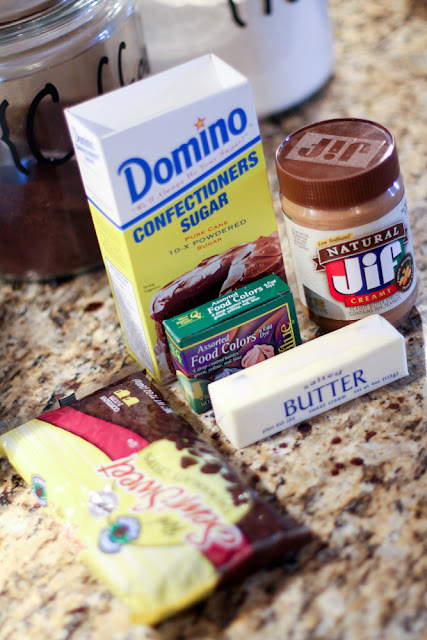
Here are your ingredients…

apple fennel salad

Dressing: 1/2 cup extra virgin olive oil, 1/4 cup lemon juice, 1 shallot, minced, 1 Tbsp. brown sugar, 1 tsp. Dijon mustard, salt and pepper to taste. Whisk together first five ingredients. Add salt and pepper to taste.

Salad: 1/2 cup coarsely chopped walnuts, 1 Gala apple, 1 medium fennel bulb, 1 celery rib, 5 oz. package fresh arugula, 1 cup loosely packed fresh parsley leaves

chopping fennelToast walnuts either in pan on stove or in oven. Thinly slice apple, fennel and celery. (If you’ve never used fennel, cut off the stalks and bottom end and slice like an onion.) Coarsely chop parsley.

apple fennel salad

Place arugula in a bowl and top with parsley, apples, fennel, celery and walnuts.

IMG_5398apple fennel salad

Toss with dressing and serve immediately.

apple fennel salad

If you are unfamiliar with fennel it has a wonderful licorice scent and flavor. I have used it only once before this recipe, and it was cooked, so I was a little hesitant, especially eating it raw. But it was absolutely delicious! It really compliments the sweetness of the apples and the peppery arugula.

fennel and apple salad

You can find the original recipe here.

Oh, I have one more thing to share. The winner of the Minted.com giveaway never contacted me. SO, that means I get to pick a new winner!

Screen Shot 2013-10-10 at 10.41.22 PM

Congrats #7, Kris S!

Screen Shot 2013-10-10 at 10.42.15 PM

PLEASE contact me Kris to claim your prize!

Itty Bitty Pumpkin Treats (revisited)

I’d like to say happy fall y’all. I don’t know which part of the country (or world) you are in, but I hope you are able to enjoy some fall-like weather. Here in South Carolina it was 87 degrees today. In parts of Colorado, I heard it was snowing. What happened to fall? Did Mother Nature forget about it this year?
Well, besides the weather, fall is showing its colors and everything is apples and pumpkins. This is an old post, but I thought I’d re-share because it’s a really cute idea for a fall treat.
These little guys are “Itty Bitty Punkin’ Treats!” They may be tiny but they are pure deliciousness!
Here is what you need:
1 box powdered sugar
1 small jar peanut butter
1/2 stick of butter
red & yellow food coloring
chocolate chips
Mix powdered sugar, peanut butter and softened butter in a bowl just until combined.
 Mix red and yellow food coloring with 1/4 cup of water until you get the desired orange.
This was a good job for Little Man #2.

Add the food coloring, a little at a time, to the peanut butter mixture and mix well.
Roll the dough into small teaspoon size balls. Little Man #2 had fun helping me with this.
Use a toothpick to create criss-cross markings across the top of the balls.

Top each ball with a chocolate chip and you have your little punkins!
You can share or save them all for yourself! :)
ENJOY!
I should note that the first time I posted this recipe I had a lot of emails asking about the bake time. There is no baking!

 By the way, forgive the appearance of my blog! Not sure what happened but something removed the buttons on the sidebar and also the design of the blog. Oops! Anyway, a new design is in the works and I can’t wait to reveal!

Fun Fall Peanut Butter Cereal Treats

peanut butter cereal fall halloween treats

I found the recipe for these bars last year in a magazine. I can’t remember which one. I thought they were really cute for a fall treat and the recipe sounded yummy. Plus they are simple enough that the kiddos can help. They are basically Rice Krispy treats using a different cereal and adding peanut butter and M&Ms. I found these red, brown and yellow ones for fall. If you can’t find them, you can always use regular and take out the blue and green.

You’ll need: 30 large marshmallows, 3 Tbsp butter, 1 Tbsp peanut butter, 6 cups Cap’n Crunch peanut butter cereal, and 1 cup M&Ms.

Add marshmallows, butter and peanut butter to a large saucepan.

Cook on medium heat, stirring often, until melted and combined.

Add the cereal…

and M&Ms…

and stir, just until combined. Don’t over stir because the M&Ms will start melting and breaking.

Transfer mixture to a greased 9×13-inch pan. Press firmly to cover bottom of pan.

Allow to cool and then serve!
I decided to cut them into bite-size squares and serve them on a lollipop stick!

peanut butter cereal fall halloween treats

YUM!

peanut butter cereal fall halloween treats

A Few Fall Recipes {Revisited}

Fall is officially here! That means pumpkins, apples and spice! I love fall flavors!
Today I’m revisiting a few of my favorite recipes that I’ve shared with you in the past. Enjoy!
pumpkin pie dip scissors and spatulas
  This dip is soooo good! And you can make a fun fall presentation by serving it out of a pumpkin! I wish I could call it my own, but I got it from Southern Living.
It’s very easy.

Recipe for Pumpkin Pie Dip 

pumpkin treats scissors and spatulas
These little guys may be tiny but they are pure deliciousness! Not to mention, adorable!
And they are simple enough that the kiddos can help!
You can get the recipe here.
apple brown betty recipe scissors and spatulas
It’s apple season! We always head up to the mountains to do some apple picking. This recipe uses both fresh apples and apple cider.
You can get the recipe here.
pumpkin chili scissors & spatulas

I have to say I was a bit skeptical of this recipe at first. But I’ll try anything once, so I went for it. So glad I did! The pumpkin gave the chili a rich, nutty flavor.

The ingredients are pretty basic. You can find the measurements here. The recipe calls for 2 jalapenos but I didn’t even use a whole one. I used white kidney beans (cannellni beans) because I thought they would go better with turkey than dark kidney beans. I also used fire roasted diced tomatoes because I really like the flavor.

Happy fall y’all!

Spooky Halloween Coffin

Lifestyle Crafts will be releasing their newest line of fall holiday die cuts on September 17. I have a little sneak peak for you of one of the dies from the Tricks ‘n Treats collection.

lifestyle crafts halloween coffin die cut

This spooky coffin was created from the QuicKutz coffin cutting die {not for sale until Sept 17}. Let me show you how I made it.
I started by measuring some designer series paper from Stampin’ Up! {view entire collection here}. What I love about SU’s designer paper is that it is heavy duty, like card stock, so you can use it for boxes, cards, etc. and it will hold up. It’s not flimsy like the paper you get at the craft store. This grey and ivory polkadot paper is from their newest Halloween collection, Howlstooth and Scaringbone {order here}.

lifestyle craft coffin die cut howlstooth paper

After cutting the paper to size, I placed the paper and die in the cutting plates and ran it through the Big Shot {order here}. The die cuts some edges and perforates others.

lifestyle craft coffin die cut howlstooth paper

The perforated edges are to be folded. The small tabs are where you will glue the sides together.

lifestyle craft coffin die cut howlstooth paper

Two way glue works best for three-dimensional objects. It makes them sturdier. It comes in a green and white bottle and you can find it in the scrapbook adhesive section of the craft store or you can order here.

lifestyle craft coffin die cut howlstooth paper

Once the top and bottom were glued, they looked like this.

lifestyle craft coffin die cut howlstooth paper

Then I decided I wanted to emboss the top, so I had to peel it apart. I had this cute spiderweb embossing folder (order here) so I used it for the coffin lid.

spider web embossing folder

And then I decided I needed to distress it with some ink (are you surprised?)

spider web embossing folder coffin die cut

Now that the coffin was finished, I needed to dress it up. I used these two small tags, part of Lifestyle Crafts Label It Kits cutting dies.

lifestyle crafts label it kit die cut

Once cut, I used Stampin Up Wicked Cool stamp set {order here}. I stamped “Spooky” and then used the spider web to stamp in just the corners of the label. Then, of course, I distressed both tags with black ink.

wicked fun stampin up

I used double-sided adhesive to stick the tags together and then added a little rhinestone embellishment {order here}.

stampin up wicked fun stamp label it kit die cut

I tied two coordinating ribbons in a single knot and attached the tag to the coffin using a dimensional adhesive {order here}. If you’re not familiar with dimensionals, they are fat, double-sided adhesive pieces that leave a gap between the two pieces you are attaching. They add “dimension” to your project!

lifestyle crafts coffin die cut stampin up wicked fun stamp

And that was it!

lifestyle crafts coffin die cut halloween decor

I added some crinkled orange paper which I cut myself using a scoring board and scissors.

The skeleton came from a Dollar Tree garland.

lifestyle crafts coffin die cut stampin up wicked fun stamp

Be sure to check out Lifestyle Crafts new fall cutting dies! Tricks ‘n Treats and Cornucopia will be for sale September 17.

Wicked Witch Pumpkin

Don’t miss the bloggy birthday bash giveaways going on now to celebrate S&S first birthday!

Can you believe that Halloween is in less than a week?! In case you are looking for some last-minute Halloween decorating ideas I’m going to share with you my “Wicked Witch Pumpkin.”

If you’ve been here before, you know that I make weekly trips to the crafts stores to pick up some items to get my creative fix. Sometimes (often times) it’s more than once a week. Anyway, I was at Michael’s one morning and came home with these.

Two black pumpkins and some wired ribbon. What did I have in mind to do with these? I hadn’t the faintest idea, I just knew I “needed” them. Once I got them home and started pondering, I decided that I wanted to decorate the pumpkin with a witch silhouette. 

I stopped by Pinterest to see if I could find any ideas there. Of couse I did! I decided to add “wicked” to my witch pumpkin. This is the image I created with my Silhouette SD.

If you don’t have one of these machines, you gotta get one! It’s fabulous! The possibilities with it are endless!

I cut the design out on outdoor vinyl. Black was the only color I had on hand which obviously wasn’t going to show up on a black pumpkin. What did I do?

I spray painted the vinyl orange before sticking it on the pumpkin! But I wasn’t quite finished. 

I added the ribbon to the top along with a candy corn pick that I had on hand.


Perfect! I decided one black pumpkin was enough for my front porch. I’m still trying to decide what to do with the other one I bought. Maybe I’ll just wait ’til next year!

Apple Brown Betty Recipe

Okay, I know I promised this recipe last week after our apple picking adventure. So sorry!  Here she is, Apple Brown Betty.
And she is as good as she looks! Ready for the recipe? I found Apple Brown Betty in my September 2011 edition of Southern Living Magazine. 

Ingredients: 4 large tart apples, fresh soft breadcrumbs, browns sugar, cinnamon, melted butter and apple cider. The original recipe calls for Granny Smith apples. I used what we got from Sky Top,  Pink Lady and Gold Rush, which are other varieties of tart apples. Pink Lady are my favorite! They were small so I used 6.

Peel the apples and cut into 1/4-inch slices.

Mix 1 cup brown sugar and 1 1/2 tsp. cinnamon in a small bowl.
Mix 4 cups breadcrumbs and 1/3 cup melted butter in another bowl.

In a greased baking dish, layer half of apple slices, 1/2 of brown sugar mixture and half of bread crumb mixture. 
Repeat the layers with the remaining apples, brown sugar mixture and bread crumb mixture.

Pour 1 cup apple cider over the top.

Bake in a 350* oven for 55 minutes to one hour.

Your whole house will be smelling fabulous as this bakes! 
Serve with a dollop of fresh whipped cream or a scoop of vanilla ice cream. 
Yum!
Recipe {courtesy of MyRecipes.com}
Ingredients

  • 4 cups soft, fresh breadcrumbs
  • 1/3 cup butter, melted
  • 1 cup firmly packed brown sugar
  • 1 1/2 teaspoons ground cinnamon
  • large Granny Smith apples, peeled and cut into 1/4-inch-thick wedges
  • 1 cup apple cider

Preparation

  • 1. Preheat oven to 350°. Stir together breadcrumbs and melted butter. Stir together brown sugar and cinnamon.
  • 2. Place half of apple wedges in a lightly greased 11- x 7-inch baking dish; sprinkle apples with half of brown sugar mixture and half of breadcrumb mixture. Repeat procedure with remaining apples, brown sugar mixture, and breadcrumb mixture. Pour apple cider over top.
  • 3. Bake at 350° for 55 minutes to 1 hour or until browned and bubbly. Let stand 10 minutes before serving.


Adventures in Apple Picking

 Yesterday the boys and I took a spur of the moment road trip. I took them up to Sky Top Orchard in Flat Rock, NC. It’s in the mountains and about a two hour drive from where we live. We visited the orchard last fall and I wanted to take them again this year but couldn’t seem to find a weekend that we could do it. So, yesterday morning, I decided to load them up and go! 
At Sky Top you can pick your own apples. We attempted to do this, but the only areas that were still “pickable” were a pretty long walk so we didn’t quite make it. But we still had fun and it was a gorgeous 74 degree, sunshiny day!

The leaves were at their peak and we had gorgeous views of red, orange and yellow landscapes.
 We wandered up and down a few of the rows of trees. We did find a couple of good apples amongst the not so good ones on the ground. But even though we didn’t get to pick our apples we took plenty home from the Sky Top market. Three bags full!

And the boys had fun riding on the wagon {Although I found out afterwards that kids are not supposed to ride on the wagons – oops!} and playing in the playhouses and on the swings and riding the tractors.
We enjoyed lots of yummy apple treats like an apple cider slushy, caramel apples and apple cider donuts. Let me tell you, Sky Top is known for it’s apple cider donuts. They cook them right then and there so they are hot and delish! They are the BEST!
Thanks Sky Top for a great day!
I’ve got all these apples, so tomorrow you can expect an apple recipe!

Itty Bitty Punkin Treats

Hey y’all! Are you ready for a cute and yummy fall treat?
These little guys are “Itty Bitty Punkin’ Treats!” They may be tiny but they are pure deliciousness!
Here is what you need:
1 box powdered sugar
1 small jar peanut butter
1/2 stick of butter
red & yellow food coloring
chocolate chips
Mix powdered sugar, peanut butter and softened butter in a bowl just until combined.
 Mix red and yellow food coloring with 1/4 cup of water until you get the desired orange.
This was a good job for Little Man #2.

Add the food coloring, a little at a time, to the peanut butter mixture and mix well.

Roll the dough into small teaspoon size balls. Little Man #2 had fun helping me with this.

Use a toothpick to create criss-cross markings across the top of the balls.

Top each ball with a chocolate chip and you have your little punkins!

You can share or save them all for yourself! 🙂

ENJOY!

Gourdy the Ghost by Freckles Crafts

Hello Scissors and Spatulas readers!My name is Rebecca, and I am the owner of FrecklesCrafts. I spend my days running my shop filled with fun craft kitsfor kids, and blogging about the daily ins and outs of being awork at home mom. I am so excited to be a guest at Jen’s blog todaywith a fun tutorial for Halloween!

October is one of my favoritemonths of the year! I love the weather, the pumpkins, and especiallyHalloween! Not only is it a really fun holiday, but it allows me toget really creative with my home decorations. Today I am going toshare with you one of my favorite crafts for Halloween that also makesa very cute decoration. Gourdy the Ghost is a simple little craftthat your kids will love helping you with!

Supplies:
  • Dried gourd (available here)
  • White craft paint (Deco Art paint works great)
  • Foam paintbrush
  • Drill with 3/32 or 1/8 drill bit
  • Black chenille stem or picture wire for hanging
  • Black permanent marker
  • Ribbon for embellishments
 Start by cleaning the gourd. Most dried gourds will have a film/cruston that will need to be removed. The above photo is of a gourd beforeit has been cleaned. A little Dawn dish soap on a rough sponge orsteel wool will clean it right up!
 See the difference? Muchbetter!
 Begin by painting the gourdwhite. I used two coats of paint to make sure the surface was niceand 
white.Next use your sharpie orpermanent marker to draw a face on your ghost. It is so much fun togive your ghost a personality! Make him scared, happy or silly!Anything goes!
 Drill a hole through the top ofyour gourd. The size of drill bit you use will depend on the materialyou will use for hanging. I used a 3/32 size drill bit for thistutorial, and a chenille stem fit through the hole
 perfectly.
Make sure you drill completelythrough to the other side so that it will hang straight.
 Thread your hanging wire throughthe holes and tie the ends together at the top. Add ribbon and otherembellishments and you are done! Isn’t he cute? Make several andhang them in a tree for a spooky 
outdoor decoration!
 
I hope you have enjoyed this tutorial!I would love for you to stop by my store and blog fora visit, or follow me on Facebook and Twitter! Here is a little snapshot of my craftkits for kids!

Thanks again Jen for having me as aguest today!