Think Superior, Think Excellence!
Get Comprehensive Roofing Services From Superior Roofing
Get a FREE Estimate for Your Roofing Work Today
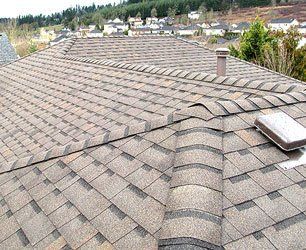
Maintain Your Home's Integrity and Value
Be sure that your family and your possessions are protected. Superior Roofing has the know-how to make your roof leak-free and secure.
Learn More About Our Residential Roofing Services
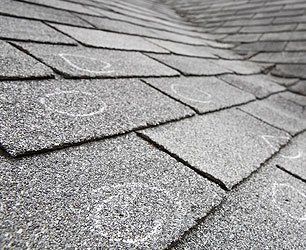
Quality Roof Inspection
Have our expert examiners inspect your roof to determine exactly what is needed to protect the framework and interior of your home or business.
Check Out Our Roof Inspection Services
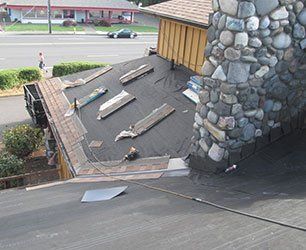
Experienced Roofing Services
With over 25 years of experience, we will ensure that your roof is of the highest quality. We can inspect, repair, or replace any roof to your satisfaction.
Contact Us for EMERGENCY Roof Repairs
We Proudly Use Portland Made Malarkey Roofing Products!
We are proud partners with Malarkey Roofing Products, a Portland-based roofing manufacturing company that has been specializing in manufacturing sustainable shingles for residential and commercial buildings since 1959.
Engineered for performance and designed sustainably with algae stain resistance, and impact protection, Malarkey architectural shingle lines are made with upcycled polymers from used tires and plastic bacs and smog-reducing granules that help clean the air.
Malarkey shingles offer sustainability without sacrificing performance.
Enhanced Warranty Options
As an Emerald Pro designated Malarkey Certified Contractor, we are able to offer extended warranty protection when you choose to install Malarkey shingles with a complete Secure Choice™ roof system.
SCAM ALERT - 03/13/2024:
SUPERIOR ROOFING & MASONRY (503) 780-2579
is scamming people by using our CCB number. They have NO association with our company. They have no valid listing with the CCB under this name. They offering masonry and roofing services impersonating they have a CCB license number - #186806 - which they do not.
They are robbing the (older) community of thousands of dollars!!
There are two men that approach in a white (Ford) truck, license plate number OR 719 GPA. One man, (name) Jay, has an English accent. He will start by offering smaller services and then continue to damage and/or upsell other work. He has Hispanic men working for him who claim to speak no English. They drive a silver/brown, compact, Toyota 4-door License plate 786JHL. They will (e.g.) turn chimney repairs into demolitions so the customer has to replace the chimney, for more money and then go from there, and will continue to scam the customer out of more and more money, and have all services paid in cash.
Be aware. This is a scam.
Validate CCB# and insurance, license and bond information before you give any money to any contractor. Ensure you are getting a formal contract with required CCB documents and the contractor is legitimate. We do not require any type of financial deposit prior to work starting.
Superior Roofing Customer Reviews
Browse Through Our Facebook Feed
Check Out Our Twitter Feed

Privacy Policy
| Do Not Share My Information
| Conditions of Use
| Notice and Take Down Policy
| Website Accessibility Policy
© 2024
The content on this website is owned by us and our licensors. Do not copy any content (including images) without our consent.